Ice-creams, just like life is all about flavors- different flavors. Again, just like life, they should be enjoyed season-to-season. And each season brings its own palette of flavors to alleviate those cravings to satiate the taste-buds.
Seasonal fruits, berries, beverages, cookies, and even veggies, you name it and it will go well in and/or with an ice-cream. This makes ice-creams something to crave for, something that should never be off the menu, something that should be perennially present in the freezer.
Now then, not everyone but you and I understand this. And we needn’t wait for the ice-cream trucks to tell us what flavors are in store. So what do we do? We make our own ice-creams.
And how do we do that? Now, we are talking and this is what I am going to tell you here now. We don’t need much more than a few ingredients, a blender, a container, and of course a freezer to make super-easy, full-of-flavor, and creamy ice-creams at home.
Try our 3-step approach.
Also, check this link which will give you a peek into the world of blenders for healthy drinks.
Homemade Ice Cream Recipe
| Prep Time: 20-30 mins | Process Time: 5-10 mins | Cooling Time: 60 mins|
| Total Time: 1 hour 30 minutes | Serves: 3 to 5 |
* ½ (Half) Cup= 8 tablespoons or 4 ounces.
Ingredients:
- 1/2 cup cold/chilled whole milk
- 1/2 cup non-fat dry milk powder:
- 1/2 cup heavy whipped cream
- 1/2 cup granulated sugar
- 1 bag (10-ounces) frozen berries or any frozen fruit (sliced)
- 1 teaspoon almond extract
- 1 glass ice-cubes
Directions:
Step 1: Prep
Cool the whole milk and heavy whipped cream in the freezer for about 20 minutes.
Chop and freeze the berries or fruit of choice alongside for 20-30 minutes.
Step 2: Process
Combine the chilled whole milk, heavy whipped cream, dry milk powder granulated sugar, and almond extract in a blender.
Blitz the ingredients for 30 seconds so that they mix well.
Add in the berries/fruits and blend for 30-45 more seconds. Occasionally, scrape the sides of the blender using a spatula. Earlier, we had reviewed the best blenders for frozen fruits. You may click this link to see if your blender is in the list.
Add the ice and blend until it smoothens. It may take up to two or three minutes.
Once smoothened, take a spoon and scoop out the mixture to taste. Just ensure that you do stop after taking a spoonful. Make it two. Alright third and no more else you won’t need to read the next step.
Step 3: Cooling
Take the smoothened mixture out from the blender (left, if any) and pour it in a plastic or a steel container.
Put the container in the freezer for 60 minutes. If you believe that you have great self-control, I may recommend you to check the container in the freezer once after 30 minutes to see if the ice-cream has set.
If you managed to wait 60 minutes, take out the container and I needn’t say further.
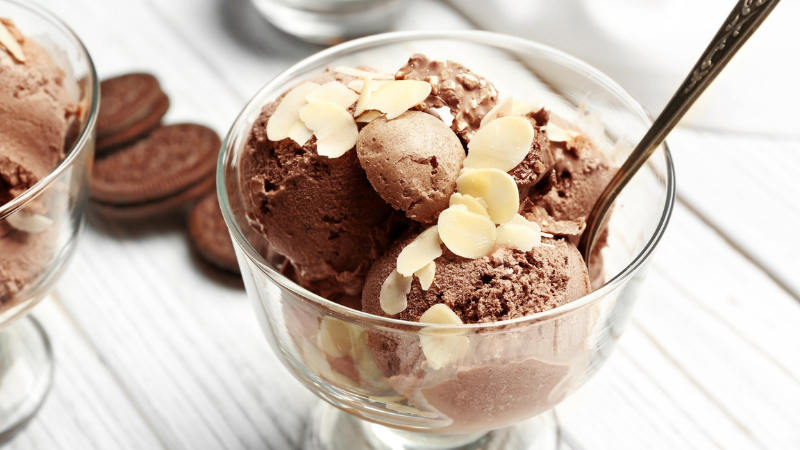
Enjoy your delicious ice-cream made in a blender.
Try different seasonal fruits, herbs (like basil or mint), berries, cookies, syrups using this method and you are just a blender and a freezer away from refreshing ice-creams.
Too much sweetness isn’t that good. Take a break and try this link to get more information on some health tips.
Tips for Ice Cream in a Blender
The point to be noted is that the texture and the softness of any ice-cream using this method will vary from blender-to-blender. So make sure that you a decent, well-maintained, clean blender.
Make healthier versions of the ice-cream by replacing sugar with stevia or honey or ripe bananas. You may even freeze these ripe bananas along with other fruits during the prep stage.
You may replace ice-cubes with milk ice-cubes. Just pour milk in the ice tray and freeze it. Add to the ice-cream and this will reduce the watery content and enhance the creamy texture. And in case you are wary of the noise that ice crushing will make, this link is for you.
Adding dry powdered milk also helps in getting the right texture and consistency. It gives an extra zing to the taste and enhances that mouthful of cool creamy feeling.
For vegan versions of the same you may use almond/coconut milk and skip the dry milk powder. You will also need to add coconut cream for a creamier texture. However, you may not get the same consistency as the milk-based versions.
You may keep this ice-cream in the freezer for up to two weeks.
Variation is essential in this process. Keep experimenting and keep trying new ingredients and spice up your ice-creams. Do share with us your feedback and creative recipes.
If you enjoy reading our posts and blogs, we recommend you to check out:

Isabelle Johnson is a fitness expert and yoga trainer with over 12 years of experience as a dietician. Her knowledge of nutritional facts has made her take to the web with her blog, Sprout and Press.
Isabelle lets her audience understand products used in the kitchen, which can improve your diet, add more convenient ways to juice, create smoothies, and do so much more. Her blog informs readers about the newest kitchenware and the benefits each ingredient brings to the table. In 2016, sproutandpress.com was founded to share her knowledge with the world and inspire a better, healthier tomorrow.