How to Clean a Rice Cooker
The pot is the part everyone washes and the part that was never the problem. A chef covers the inner lid, the steam vent cap, the dew collector, the sensors, and why Zojirushi, Tiger and Cuckoo give three incompatible cleaning answers.
Updated
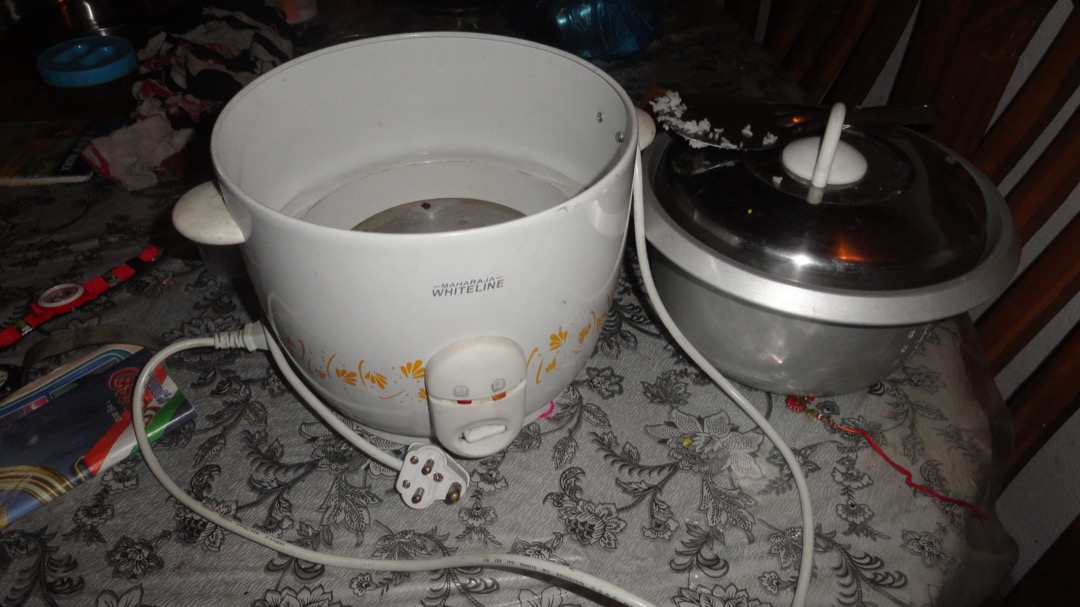
Everyone washes the pot. The pot is the easy part, it comes out, it goes in the sink, and it is almost never what was wrong. The smell in a rice cooker comes from a lid nobody has taken off, a rubber seal nobody knew was removable, a plastic cap full of dried starch foam, and a small tray at the back collecting condensation that most owners have never once emptied.
I ran a restaurant group’s test kitchen for four years, and rice cookers were the appliance that taught me how much of “this machine has gone off” is really “one component has never been cleaned.” We had cookers running twice a day. The pots were spotless because washing up is a habit. The inner lids were another matter entirely, and the first time somebody pulled one out properly, the kitchen went quiet.
This guide works in the order the parts actually matter, which is roughly the reverse of the order people clean them. It also does something most rice cooker cleaning articles avoid, which is to be honest that Zojirushi, Tiger and Cuckoo publish three mutually incompatible sets of instructions, and that the correct answer for you depends on which machine is on your counter.
The Part That Smells Is Not the Pot
A rice cooker’s job produces starchy steam, and steam goes upward and outward. It condenses on the underside of the lid. It carries foam out through the vent. It collects at the back in whatever tray the designer put there to catch drips. Every one of those places is warm, damp, coated in a thin film of rice starch, and never dried out.
The pot, meanwhile, holds water for most of the cycle, gets rinsed after every meal, and is made of something specifically chosen not to hold onto food.
So if your rice has started tasting faintly of old rice, or the machine smells when you open it cold, the diagnostic order is: inner lid first, then the gasket behind it, then the steam vent cap, then the dew collector, then the pot. In four years I do not think I ever traced a smell to the pot.
The Five Minutes After Dinner
Here is the whole routine, and it is short because everything difficult on this page began as something easy that was left for a week.
Let the cooker cool and unplug it. Tiger’s published sequence starts exactly here, and the reason is not only safety: parts release their residue far more easily warm than baked, and far more easily than after they have been through another heating cycle with the residue still on them.
Take out the inner pot and wash it. Take off the inner lid, if yours comes off, and wash it. Lift out the steam vent cap and rinse it under running water. Pull the dew collector at the back and empty it. Wipe the underside of the outer lid with a damp cloth. Wipe the rim and the interior of the cooker body with a barely damp cloth. Dry everything, and dry the outside of the inner pot before it goes back in.
That last step is not fussiness. Aroma’s manual makes it a numbered safety instruction: always make sure the outside of the inner cooking pot is dry before use, because returning a wet pot to the cooker may damage it or cause it to malfunction. Zojirushi says the same thing from the other direction, telling you to wipe any moisture or stuck rice off the outside of the pot before setting it back so the side sensors stay clean and can read properly. Water and rice grains between the pot and the sensors is one of the most common causes of a cooker that has started cooking badly for no apparent reason.
The Inner Lid, and the Cookers That Do Not Have One You Can Remove
On most modern cookers the inner lid is a metal or plastic plate that clips to the underside of the main lid, with a rubber gasket around its edge. It is the surface directly above the rice, it catches everything the steam carries up, and it is designed to come off.
Zojirushi’s guidance is to remove it after every use, soak it in water so rice does not harden onto it, wash it with a soft sponge, and dry it thoroughly before putting it back. Cuckoo says the same in different words. Tiger’s instruction is to remove the inner lid with both hands, pulling gently toward you, and to wash it separately. None of them treat this as an occasional deep clean. It is the after-every-use part.
The gasket matters as much as the plate. It sits in a groove, it is the one part of the machine made of something that can absorb smell, and Zojirushi is direct about it: build-up of debris on the inner lid gasket may cause odours in the rice.
Then there are the cookers where the inner lid does not come off at all, and this is the part of the topic that generic cleaning articles skip entirely. Zojirushi’s own reply to an owner of the NS-MYC10 asking how to clean inside the top lid was that the inner lid on that model is not designed to be removable, that they recommend cleaning from the outside as much as possible, and that they do not recommend disassembling the lid. A second owner of the same model described brown residue visible on the upper side of the stainless lid through the steam vent, with no way to reach it.
If that is your machine, clean the underside of the outer lid with a damp cloth after every use, before anything dries, and keep the vent cap immaculate so less foam gets past it. Panasonic gives the same instruction for its own non-removable lids: wipe them down carefully with a damp cloth rather than attempting to get inside. Do not take the lid apart. And when you replace the cooker, treat a removable inner lid as a requirement rather than a feature, because it is the difference between a machine you can keep clean and one you cannot. It is the first thing I check on any cooker, and it is why it carries real weight in our rice cooker picks.
The Steam Vent Cap
Most microcomputer rice cookers have a small cap sitting in a receptacle on top of the lid. Zojirushi describes the system as three parts: a vent that runs through the cover and inner lid into the body where the pan sits, a cap over it, and the receptacle the cap rests in.
Its purpose is worth knowing because it explains the mess. The cap catches the foamy starch that comes out with the steam, which lets the cooker run the rice at a higher heat without overflowing. So the cap is, by design, the part that fills with starch. It is not a sign anything is wrong.
Wash it under running water and wipe the receptacle area with a soft cloth to take out the moisture sitting in it. Cuckoo suggests a soft brush for the vent itself. A cap that has been left long enough to clog is a genuine functional problem rather than a cosmetic one, since a partly blocked vent is a common reason a cooker that used to behave has started spitting starchy water down its own side. Zojirushi lists a steam vent cap that has become too dirty, clogged or hard to remove as a part to replace rather than to keep scrubbing.
Rinsing the rice properly before it goes in cuts the amount of foam reaching the vent noticeably, because most of that foam is loose surface starch. That is a cooking step rather than a cleaning one, and it is covered in how to use a rice cooker, but it wants the right tool. Standard colander perforations are larger than a grain of rice, so rinsing in an ordinary colander sends a good share of the rice down the drain, which is why a fine-mesh colander is the one that matters here.
The Dew Collector
Many cookers have a small removable cup or tray at the back that catches condensation running off the lid when you open it. Cuckoo calls it the water drainage tray and tells you to empty it and wash it with soapy water regularly to keep the rice fresh. Tiger lists the dew collector among the parts to remove at the start of a clean.
It is the single most-forgotten component on a rice cooker, because it is behind the machine, it is usually the same colour as the body, and nothing goes visibly wrong when you ignore it. What goes invisibly wrong is that a cup of starchy water sits there in a warm kitchen indefinitely. If your cooker has one, empty it every time. It takes two seconds.
The Inner Pot, and the Four Habits That Ruin a Coated One
Hardened rice in the pot needs water and time, not force. Zojirushi’s instruction is to fill the pot with water until the rice softens, then use a soft sponge and rinse. That is the whole method, and it works on a badly scorched bottom too.
There is one caveat on soaking that almost nobody states, and America’s Test Kitchen is the exception: do not leave the inner pan soaking for too long, because it can rust. That sounds contradictory next to the advice to soak, and it is a matter of degree. A few hours softens hardened rice. A pot left full of water for two days is a different situation, particularly around any chip in the coating where the aluminium underneath is exposed. Soak until the grains lift, then wash and dry it.
The damage comes from impatience. Tiger publishes three specific warnings that I would apply to any coated pot on any brand: never use the abrasive side of a sponge on the inner pot, never wash other dishes or utensils inside the inner pot, and never stand the inner pot upside down or on top of other dishes to dry. Any of those, Tiger says, can permanently damage the nonstick coating. The second one catches people out, because using the pot as a washing-up basin feels harmless and is how most pots get their first scratches. Add a fourth from Aroma’s manual: no harsh abrasive cleaners, no scouring pads, and nothing not rated as safe for nonstick coatings.
A word on what a damaged coating in a rice cooker actually means, because the fear is usually aimed at the wrong risk. PTFE begins to decompose somewhere around 500 degrees Fahrenheit, and a rice cooker’s pot is full of water for the whole cycle, so it does not go meaningfully past boiling. The offgassing concern that applies to a dry pan on a hot burner does not apply here. The real problems with a scratched rice cooker pot are duller: rice sticks, the scorched layer gets worse each time, and flakes end up in the food. If you would simply rather not own a coating at all, that is a legitimate preference, and it is the same reasoning behind our non-toxic air fryer and non-toxic bread machine picks.
It is also solvable at purchase. Most cookers sold as stainless steel have a stainless body over a coated aluminium pot, and a genuinely bare stainless steel inner pot changes this whole section, because there is no coating left to protect. You can scrub it, soak it, and put it in a dishwasher. The trade-off is that rice sticks more readily and you do more soaking, which is a fair exchange for a pot that cannot be ruined by a sponge.
Vinegar, Bleach or Neither: the Manufacturers Genuinely Disagree
This is the part where the internet speaks with one voice and the people who built the machines do not.
Cuckoo recommends vinegar. Its cleaning guide says to make a mixture of vinegar or lemon water, fill the inner pot, and run a short steaming cycle to clear unwanted odours.
Zojirushi forbids it. Its basic care guidance lists vinegar in the same sentence as metal scouring pads, stiff brushes and cleansers, as things that can scratch, discolour, deform, crack or corrode the parts.
Tiger recommends dilute bleach. Its published cleaning tutorial has you make a sanitising solution of two tablespoons of chlorine bleach and two tablespoons of dishwashing liquid in enough hot water to cover the removable parts, soak them for two to three hours, then rinse thoroughly and dry well.
All three are real, published, current instructions from major manufacturers. They cannot all be the right answer for your machine, and the resolution is less exciting than the disagreement: follow your own manual, because that is what your warranty is written against.
Here is what each brand actually publishes, which as far as I can tell nobody has put side by side before.
| Brand | Inner lid | Dishwasher | Their own line on cleaners |
|---|---|---|---|
| Zojirushi | Removable on most models, fixed on some | Hand wash; the inner lid can crack in a dishwasher | No metal scouring pads, stiff brushes, cleansers or vinegar |
| Tiger | Removable, plus steam cap, gaskets and dew collector | Not stated | A soak in dilute chlorine bleach and dish liquid, two to three hours |
| Cuckoo | Removable | Not stated | Vinegar or lemon water in the pot, run through a short steaming cycle, for odours |
| Aroma | Removable, plus condensation collector | Top rack for the pot and accessories; slight discolouration is cosmetic only | Nothing not rated safe for nonstick coatings |
| Instant Pot | Removable | Stainless pot yes; lid, its accessories and the steam rack top rack | Base and condensation rim, barely damp cloth only |
| Panasonic | Removable on most; gives separate guidance if yours is fixed | “Usually dishwasher safe,” but check your model’s manual | No harsh chemicals, and never immerse the base |
If you have no manual, here is how I would reason about it. A short, dilute vinegar contact inside the pot, rinsed off, is a mild acid doing a mild job and is very unlikely to hurt anything. Vinegar left standing for hours, or used repeatedly on gaskets and plastic, is what Zojirushi is warning about, and prolonged acid contact on those materials is a genuine problem rather than a theoretical one. America’s Test Kitchen lands in the same place from a third direction, grouping vinegar solutions with abrasive sponges as things to keep off a nonstick pan. So: inside the pot, briefly, rinsed, and not at all if your pot is coated and you have an alternative. The same logic, acid for minerals and smells but never for coatings or long soaks, runs through every job in our guide to household uses of vinegar.
As for the bleach soak, I would keep a coated aluminium pot out of it regardless of brand and reserve it for the plastic parts, and I would rinse far more thoroughly than feels necessary. Chlorides are hard on stainless steel, which is exactly why they are worth respecting on anything you cook in.
What none of the three recommend, and what shows up constantly in home cleaning advice, is baking soda scrubbed on a coated pot. It is an abrasive. On a pot whose whole value is an intact surface, that is the wrong tool no matter how gentle it feels in your hand.
The Heating Plate, the Sensors and the Air Port Underneath
Three parts of the cooker body need attention and none of them go anywhere near a sink.
The heating plate is the disc the pot sits on. Tiger’s instruction is to remove any leftover grains or food from the heating plate and the centre sensor, then wipe with a wrung-out cloth. A single grain of rice trapped under the pot holds it off the plate, and a pot that is not sitting flat cooks unevenly and reads its temperature late.
For a plate that has been neglected long enough to carry burned-on splotches, there is a genuinely unexpected fix that comes from Zojirushi and that America’s Test Kitchen tried and published: ultrafine 320-grit sandpaper, dipped in water and squeezed out so it is damp rather than dripping, rubbed lightly over the plate, then wiped with a damp cloth. It works on any cooker with a metal heating plate and sensor, not only Zojirushi’s. The one restriction matters: if your heating plate or sensor is ceramic, skip it entirely, because sandpaper will scratch it. This is the only place in this guide where an abrasive is the right answer, and it is the only surface in the machine that no food ever touches.
The sensors are the centre one in the plate and, on many machines, side sensors around the well. Zojirushi’s care guidance is to keep them free of dirt and debris, and to wipe moisture and rice off the outside of the pot before setting it back. These are the parts that decide when your cooker thinks the rice is done, so residue here shows up as bad rice rather than as visible dirt.
The air intake and exhaust port on the bottom of the cooker is the one almost nobody knows about. Zojirushi says it must be clear for the cooker to work properly, and recommends clearing any obstruction with a vacuum cleaner. It takes ten seconds and it belongs in an annual clean rather than a daily one.
Then the absolute rule, stated by every manufacturer in some form. The cooker body never goes in water. Panasonic puts it as a flat sentence in the middle of its cleaning steps: never immerse the base of the rice cooker in water. Aroma’s safeguards say do not immerse the cord, plug or appliance in water or any other liquid. Tiger’s note is to avoid letting water get inside the unit because it could short circuit the machine. A barely damp cloth, wrung out, is the only thing that touches the body. Instant Pot’s guidance is the same, wiping the inside of the outer pot and the condensation rim with a barely damp cloth and letting it dry completely before the inner pot goes back.
Panasonic adds the step people rush: make sure the heating plate is completely dry before you reassemble, to avoid electrical problems. A cooker wiped and immediately closed up is a cooker with a damp plate under a pot, which is both an electrical risk and the fastest route to corrosion in the one part you cannot replace.
When the Smell Comes Back After You Have Cleaned Everything
If you have washed the lid, the gasket, the cap and the collector and the odour returns within days, the cleaning is not the problem, the gasket is.
Zojirushi’s replacement guidance is unusually specific and worth keeping. Replace the inner lid gasket if steam leaks around the cooker while it is running, if the gasket has lost elasticity or hardened, if it discolours or develops dark mould spots that will not come off, or if it still smells after washing, because at that point the odour will transfer into the rice. Gaskets are stocked as spare parts by every serious brand and cost very little.
A related diagnostic: if your cooker has started dripping noticeably more condensation from the lid than it used to, Zojirushi’s customer service points at the same part. A little dew on opening is normal, but a clear increase over time suggests the inner lid gasket is wearing.
Two other odour sources are behavioural rather than mechanical. Rice held on Keep Warm too long discolours and develops an off smell, and both Zojirushi and Aroma put the ceiling at about twelve hours. And if you own a Zojirushi pressure IH model, check your manual for a self-cleaning cycle, which several of them include specifically to clear stubborn odours.
Hard Water and the White Film
If you live somewhere with hard water you will eventually see a chalky white bloom inside the pot at the fill line, or a dull film on the heating plate. That is calcium carbonate, the same deposit that furs up a kettle, and it needs an acid rather than a scrub. Scrubbing it off a coated pot costs you the coating and leaves the scale to come back.
The chemistry, and why baking soda cannot do this job, is covered properly in our guide to descaling a kettle. The difference here is that a rice cooker constrains you more: any acid treatment stays inside the pot, stays short, gets rinsed thoroughly, and does not happen at all if your manual forbids it. For the heating plate, a barely damp cloth and patience, repeated, is the only safe approach, since nothing wet should be sitting in that well.
The Things That Actually Damage a Rice Cooker
Five, and every one of them is common.
Immersing the body. It is the one mistake that ends the appliance rather than degrading it.
Putting the pot back wet. Aroma makes this a safety instruction rather than a tip, because water between the pot and the heating plate can damage the cooker, and moisture on the sensors makes it cook badly long before it fails.
Abrasives on a coated pot. Scouring pads, the rough side of a sponge, metal utensils, baking soda paste. The damage is permanent and cumulative.
Leaving the inner lid on for weeks. This is the slow one. Nothing appears to go wrong until the rice tastes of the machine, and by then the gasket usually needs replacing rather than washing.
Using the inner pot on a stovetop. Aroma’s manual warns against it directly, because it deforms the pot, and a deformed pot no longer sits flat on the heating plate. If you are cooking rice on a hob, cook it in a saucepan and keep the cooker pot for the cooker.
When Cleaning Has Stopped Being the Answer
Two honest endpoints are worth naming, because a lot of effort gets spent on machines that have already lost the argument.
Replace the pot when the coating has gone. Zojirushi’s own guidance says the inner pan should be replaced if the bottom burns after cooking or if rice has started sticking to the inside where it did not before, and also if the pot has been dented or deformed. Replacement pots are sold for every reputable brand and cost a fraction of the machine. A dented or scratched pot is not a cleaning problem and no amount of soaking will bring it back.
Replace the cooker when the parts that need cleaning cannot be cleaned. A fixed inner lid with residue you can see and cannot reach is that situation, and so is a cooker whose gaskets are no longer available. If you are at that point, the two things I would insist on next time are a removable inner lid and a removable, washable steam vent cap, in that order, ahead of any cooking feature. Our rice cooker picks weigh both, and if you want the version of this problem that mostly does not arise, a bare stainless inner pot removes the most fragile part of the equation. If your reason for replacing is that you want one appliance instead of two, rice cooker versus Instant Pot covers that trade honestly.
A Realistic Schedule
After every use: wash the pot, the inner lid and the steam vent cap. Empty the dew collector. Wipe the underside of the outer lid. Dry the outside of the pot before it goes back.
Weekly: wipe the cooker body, the rim and the interior well with a barely damp cloth. Clear any grains from the heating plate and wipe the centre and side sensors. Look at the gasket properly, in good light, rather than glancing at it.
Annually: check the gasket for hardening, discolouration or mould and replace it if any of those have started. Check the vent cap for cracks. Vacuum the air port on the underside.
Two habits carry nearly all of this. Take the inner lid off every time, not when you remember, because it is the ten seconds that prevents every odour problem on this page. And dry everything before it goes back together, since a rice cooker reassembled damp is a rice cooker fermenting quietly until tomorrow. Do those two and the machine will outlast the coating on its pot, which is exactly the right order for things to wear out in.
Once it is clean, the cooking side is a separate skill, and mostly a matter of measurement: rice to water ratio for the everyday case, and brown rice in a rice cooker for the one that defeats most machines. If you have an Aroma specifically, using an Aroma rice cooker covers its particular controls.
Frequently Asked Questions
Can you put a rice cooker inner pot in the dishwasher?
How do you clean a rice cooker that smells?
How do you clean a rice cooker lid that does not come off?
Can you use vinegar to clean a rice cooker?
How do you get burnt rice off the bottom of a rice cooker pot?
Related Articles
How to Use a Rice Cooker
small-appliances
How to Use an Aroma Rice Cooker
small-appliances
Rice Cooker vs Instant Pot: Which One Actually Cooks Better Rice
small-appliances
The 9 Best Rice Cookers of 2026, Tested by a Chef
small-appliances
The 9 Best Stainless Steel Rice Cookers of 2026, Tested by a Chef
small-appliances
About the Reviewer

Nora Whitfield, CIA Culinary Arts, ServSafe Certified
A.O.S. Culinary Arts, The Culinary Institute of America
Nora Whitfield trained at the Culinary Institute of America and spent twelve years in professional kitchens, the last four running the test kitchen for a regional restaurant group where her job was to decide which equipment could survive a dinner service and which could not. She has seasoned more carbon-steel woks than she can count, boiled water in every kettle worth owning, and broken enough cheap gear to know exactly where manufacturers cut corners. She reviews kitchen equipment the way she specified it professionally: cook on it, clean it, and see what it looks like after a month.