Rice to Water Ratio: The Chart for Every Type of Rice (Stovetop, Rice Cooker, Instant Pot)
Exact rice to water ratios for white, jasmine, basmati, sushi, brown, wild, and arborio rice, by volume and by weight, plus separate numbers for each method.
Updated
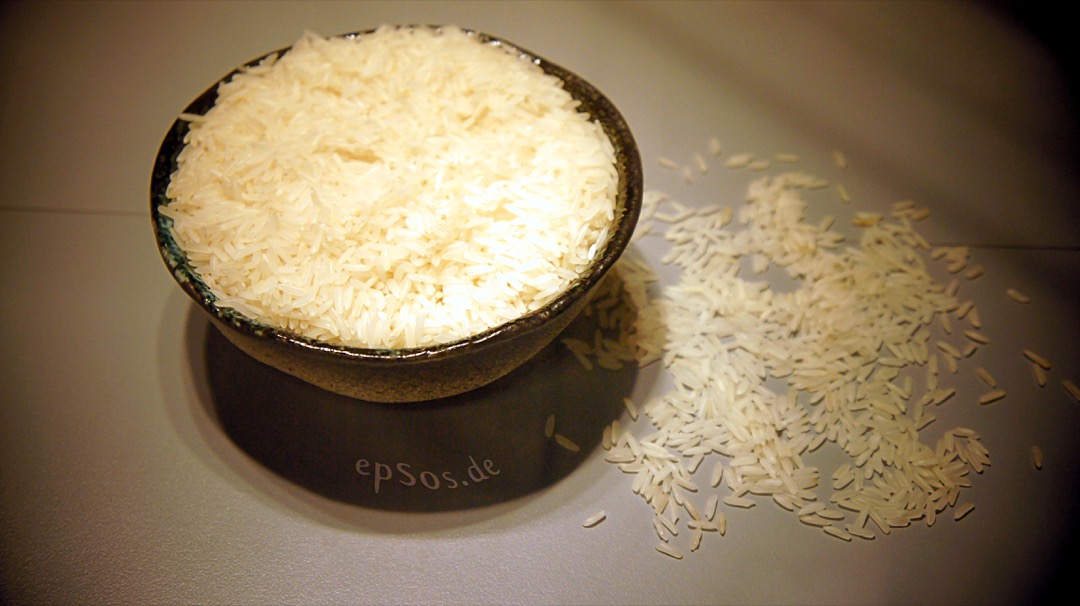
Bad rice is almost always a measuring problem. The grain was fine, the pot was fine, and the heat was fine, but the water was off by twenty percent and there is no recovering from that once the lid goes down. I ran a restaurant-group test kitchen for four years and rice was the single most common thing new cooks got wrong, not because it is difficult but because they had memorized one ratio and applied it to every bag on the shelf.
There is no universal rice to water ratio. There are about nine of them, and which one you want depends on three things: the variety of rice, whether you rinsed or soaked it, and whether the vessel you are cooking in lets steam escape. That last factor is the one most charts ignore, and it is why the same cup of jasmine rice needs 1.25 cups of water in a saucepan and 1 cup flat in an Instant Pot.
Below is the full chart, then the reasoning behind each column, then the technique that makes the numbers land: rinsing, soaking, the knuckle trick and where it breaks, resting, and altitude.
If you would rather not do the arithmetic, our free rice to water ratio calculator applies this whole chart to whatever amount you are cooking, and it asks which cup you are holding, which is the part that trips people up.
The Complete Rice to Water Ratio Chart
All ratios are rice to water by volume, using the same cup for both. Simmer times are for the stovetop after the pot has come to a boil and the heat has been dropped to low.
| Rice type | Stovetop | Rice cooker (no fill lines) | Instant Pot / pressure | Stovetop simmer | Pressure time |
|---|---|---|---|---|---|
| Long-grain white (Carolina, generic) | 1 : 1.5 | 1 : 1.25 | 1 : 1 | 15 min | 3 min + 10 min natural |
| Jasmine | 1 : 1.25 | 1 : 1.15 | 1 : 1 | 12 min | 3 min + 10 min natural |
| Basmati, unsoaked | 1 : 1.5 | 1 : 1.25 | 1 : 1 | 15 min | 4 min + 10 min natural |
| Basmati, soaked 30 min | 1 : 1.25 | 1 : 1 | 1 : 1 | 12 min | 4 min + 10 min natural |
| Short-grain / sushi (Koshihikari, Calrose sushi) | 1 : 1.15 | 1 : 1.1 | 1 : 1 | 13 min | 3 min + 10 min natural |
| Medium-grain (Calrose, bomba excluded) | 1 : 1.25 | 1 : 1.15 | 1 : 1 | 15 min | 4 min + 10 min natural |
| Brown, long-grain | 1 : 2 | 1 : 1.75 | 1 : 1.25 | 45 min | 22 min + 10 min natural |
| Brown, short-grain | 1 : 2.25 | 1 : 2 | 1 : 1.3 | 50 min | 24 min + 10 min natural |
| Parboiled / converted | 1 : 2 | 1 : 1.75 | 1 : 1.25 | 20 min | 6 min + 10 min natural |
| Black / forbidden | 1 : 1.75 | 1 : 1.75 | 1 : 1.25 | 32 min | 22 min + 10 min natural |
| Red (Bhutanese, Camargue) | 1 : 1.75 | 1 : 1.75 | 1 : 1.25 | 22 min | 18 min + 10 min natural |
| Wild rice (boil and drain) | 1 : 3 | not recommended | 1 : 2 | 45 to 55 min | 25 min + 10 min natural |
| Arborio, plain absorption | 1 : 2 | 1 : 2 | 1 : 1.25 | 18 min | 5 min + quick release |
| Arborio, risotto method | 1 : 4 stock, added in stages | not applicable | 1 : 3 stock | 18 to 20 min | 6 min + quick release |
Two entries need a caveat rather than a number. Wild rice is not rice, it is the seed of an aquatic grass, and it cooks best boiled in loose water like pasta and then drained, which is why the 1 to 3 figure is a starting pot volume rather than an absorption target. Glutinous or sweet rice for mango sticky rice or Lao khao niaw is soaked for four hours and then steamed over water rather than boiled in it, so it has no ratio at all.
Ratios by Weight, and When Weight Matters
Volume is fine for home cooking. Weight is better when you are cooking a large batch, when you want the same result every single time, or when you are working with an unfamiliar variety.
Uncooked long-grain white rice packs at roughly 0.80 grams per milliliter, so a US cup holds about 190 grams. A rice cooker’s 180 ml cup of Japanese short-grain holds about 150 grams. Water is 1 gram per milliliter, so a cup of water is 236 grams.
That density difference means a weight ratio is always higher than the volume ratio for the same pot. Multiply the volume ratio by about 1.25 to convert:
| Grain | Volume ratio | Weight ratio | Example |
|---|---|---|---|
| Long-grain white, stovetop | 1 : 1.5 | 1 : 1.9 | 200 g rice, 380 g water |
| Jasmine, stovetop | 1 : 1.25 | 1 : 1.55 | 200 g rice, 310 g water |
| Short-grain, rice cooker | 1 : 1.1 | 1 : 1.4 | 150 g rice, 210 g water |
| Brown long-grain, stovetop | 1 : 2 | 1 : 2.5 | 200 g rice, 500 g water |
Weigh the water rather than measuring it and you remove the biggest source of error in the whole process, which is a meniscus read at eye level over a sink. A kitchen scale set to grams handles rice and water in the same bowl with a tare in between.
Why the Package Says 1 to 2 and Why It Is Wrong
Nearly every bag of American long-grain white rice prints 1 cup rice to 2 cups water. That instruction is calibrated for a pot with a loose or vented lid, on a burner that will not hold a true low simmer, boiling off a meaningful fraction of that water over 18 minutes. It was written to be safe rather than accurate, because scorched rice generates complaints and slightly wet rice does not.
If your lid actually seals against the rim, 2 cups of water per cup of rice will give you a soft, waterlogged grain with a slick surface. Use 1.5 and you will get separate, distinct grains. The test is simple: bring the covered pot to a simmer, watch for steam escaping around the lid, and if you see a steady plume you are losing water and can move back toward the higher number.
Stovetop, Rice Cooker, and Instant Pot Are Three Different Machines
The whole reason a single ratio cannot work is that these three vessels lose water at completely different rates.
A stovetop pot loses the most. Even a good lid vents, and 15 to 20 minutes of simmering carries off a real volume of water as steam. The stovetop column in the chart above is absorption plus that evaporation loss. Pot geometry matters here too. A wide, shallow saucepan evaporates faster than a tall, narrow one with the same capacity, so if you cook rice in a 12-inch sauté pan you will need to nudge the water up by a couple of tablespoons per cup.
An electric rice cooker loses very little. The lid clamps, the seal is real, and a fuzzy-logic model actively manages the temperature curve so the pot never runs hard enough to blow steam continuously. That is why the fill lines inside the inner pot sit lower than a stovetop ratio would suggest, and why a good rice cooker produces more consistent rice than a burner with no effort from you. If you have lost the inner pot’s markings or you are cooking a grain the machine has no program for, the rice cooker column in the chart is your fallback.
A pressure cooker loses almost nothing. The valve seals, the pot pressurizes, and the water that turns to steam condenses right back into the rice. All you need is what the grain absorbs, which is why long-grain white, jasmine, basmati, and short-grain all land at a flat 1 to 1 in an Instant Pot. Respect the minimum liquid rule: a 6-quart pot wants roughly a cup of total liquid to reach and hold pressure, so a single cup of rice at 1 to 1 sits right at the threshold and can trip a burn warning. Cook 1.5 cups or more, or run pot-in-pot with a cup of water in the outer liner and your measured rice and water in a bowl on the trivet.
The 180 ml Rice Cooker Cup
The plastic cup in the box with your rice cooker is not a measuring cup. It holds 180 ml, a Japanese unit called a gō, and a US measuring cup holds 240 ml. That is a 25 percent gap, and mixing the two systems is the most common rice cooker failure I see.
It breaks in both directions:
- Rice measured in the 180 ml cup, water added by a stovetop ratio from a US cup. You add roughly a third more water than the grain needs. This is the mushy outcome, and it is the more common of the two because people trust a recipe over an etched line they cannot quite read.
- Rice measured in a US 240 ml cup, water filled to the matching numbered line. You have 33 percent more rice than the line assumes, so the water is badly short. This gives hard grains at the top and a scorched crust on the bottom.
Pick one system and stay inside it. Either measure rice with the cooker’s own cup and fill water to the line with the number that matches how many cups of rice you put in, or ignore the lines completely and measure both rice and water with the same US cup at the ratio from the chart. Both work. Half of each does not. If you are new to the machine, our guide on how to use a rice cooker walks the whole cycle.
Two hardware notes that change the numbers slightly. A stainless steel inner pot rice cooker has no nonstick coating, so the bottom layer scorches more readily at the dry end of the range. Add about two tablespoons of water per cup of rice compared to a coated pot, and rinse the grain thoroughly, since loose starch is what actually welds itself to bare steel. A Korean rice cooker from Cuckoo or Cuchen is usually a genuine pressure cooker rather than a simple boiler, and its fill lines are already calibrated for the lower evaporation of a sealed pressurized cook. Use its lines, not a stovetop ratio.
Small Batches and Microwave Cookers
Both ends of the batch-size range have their own problems.
Small batches suffer disproportionately from evaporation, because the surface area of the pot stays the same while the volume of rice shrinks. One cup of rice in a full-size pot can lose a quarter of its water before the grain is done. A compact 3-cup rice cooker built for small batches solves this properly by matching the vessel to the load, and it is the appliance I recommend for one or two people rather than running a 10-cup machine at its minimum. If you are cooking a small batch on the stovetop instead, add about two tablespoons of extra water per cup of rice and use the smallest pot you own with the tightest lid.
A microwave rice cooker needs more water than any other method, because the lid vents by design to keep the vessel from erupting. Plan on 1 : 1.75 to 1 : 2 for white rice, and check the manufacturer’s booklet, since vent size varies enough between models to move the number. Cook on full power until it boils, then at 50 percent power for the remaining time, and let it stand covered for the same 10 minutes you would give a pot.
Rinsing
Rinse white rice. Put it in a bowl, cover with cold water, swirl it with your fingers, pour off the cloudy water, and repeat three or four times until the water runs nearly clear. What you are washing away is loose surface starch produced when the grains rub against each other during milling and shipping, and that starch is exactly what makes cooked rice gluey and clumped.
Two exceptions. Do not rinse arborio or carnaroli for risotto, because the surface starch is the thickening agent and washing it off leaves you with soup. Do not rinse enriched American white rice if you care about the added iron and B vitamins, which are sprayed on as a surface coating and go straight down the drain.
Rinsing does not change the ratio, but wet rice does. Drain the rice properly in a strainer and give it a good shake. If it sat soaking for more than a couple of minutes, cut the cooking water by a tablespoon or two per cup to account for what the grain already picked up.
Soaking
Soaking hydrates the grain before heat ever reaches it, which means the outside does not overcook while the center is still catching up.
Basmati benefits the most. Twenty to thirty minutes in cold water lets it elongate properly during the cook, which is the whole point of the variety, and it cuts both the water and the time. Soaked basmati drops from 1 : 1.5 to 1 : 1.25.
Brown rice softens noticeably with an hour of soaking and cooks 10 to 15 minutes faster. Reduce the water by about two tablespoons per cup. If you are cooking it in an appliance, the dedicated program handles this for you, and we cover the timing in detail in our guide to cooking brown rice in a rice cooker.
Japanese short-grain is traditionally soaked 30 minutes in its measured cooking water rather than being drained. Do not reduce the water, because none of it left. This soak is also why a rice cooker’s white rice cycle takes 45 to 50 minutes rather than 20: it is holding the pot at a warm soak temperature before it ever brings the water to a boil.
The Knuckle Method, and Where It Actually Fails
The finger trick is real. Rinse the rice, level it in the pot, rest your fingertip on the surface of the grain, and add water until it reaches your first knuckle, roughly 5/8 of an inch or 1.5 cm above the rice.
Here is why it works, and it is worth understanding because the same reasoning tells you when to stop trusting it. Poured rice packs with about 45 percent void space between the grains, so the first 45 percent of your water disappears into the bed without raising the level at all. The water that stands above the surface is the remainder. Run the arithmetic and the depth of standing water you need comes out to roughly 0.75 times the depth of the rice bed for short-grain, which is not a constant. It scales with how deep the rice is.
The knuckle works because in a normal home saucepan, two to four cups of rice makes a bed somewhere between 2 and 4 cm deep, and 1.5 cm of standing water is close enough across that whole band. Outside it, the method drifts:
- One cup of rice in a large pot gives a shallow bed, so a knuckle of water is too much and the rice comes out wet.
- Six or more cups in a tall stockpot gives a deep bed, so a knuckle is too little and the top layer stays hard.
- A wide sauté pan spreads the rice thin and gives you the small-batch failure even at normal quantities.
- Brown rice needs far more water than any knuckle depth provides. Measure it.
Use the knuckle for two to four cups of white rice in a standard saucepan. Measure everything else.
Resting and Fluffing
When the timer goes off, the rice is not done. Pull the pot off the heat and leave the lid on for a full 10 minutes.
Two things happen in that window. Moisture redistributes from the saturated bottom layer, which sat in standing water, up into the drier grains at the top, so the batch evens out. And the starch gel that formed during cooking sets as it cools slightly, which is what lets the grains hold their shape instead of tearing when you disturb them. Fluff a pot of rice the instant it finishes cooking and you will mash a third of it.
After 10 minutes, take the lid off and fluff with a rice paddle or a fork, cutting down through the mass and lifting rather than stirring in circles. Stirring is what turns rice into paste.
Rice cookers do this automatically by dropping to keep-warm, but the rule still applies to you: leave the lid down for 10 minutes after the cycle ends before you open it. Sushi rice is the one case where you move faster, since it needs to go into a wide wooden bowl and receive its seasoned vinegar while still hot, which is covered in our guide to making sushi rice.
Altitude
Water boils cooler as elevation rises, about 2F lower per 1,000 feet. In Denver your pot tops out near 203F, and in Leadville nearer 194F. Rice starch needs both time and temperature to fully gelatinize, so a lower boiling point means a longer cook, and a longer cook means more evaporation. You need more of both.
- Below 3,000 feet: no adjustment.
- 3,000 to 6,000 feet: add 2 tablespoons of water per cup of rice and 5 minutes to the simmer.
- Above 6,000 feet: add 1/4 cup of water per cup of rice and 10 minutes, and check the pot rather than trusting a timer.
Pressure cooking sidesteps the problem entirely, because it restores the internal boiling point regardless of where you live, and it is genuinely the better tool above about 6,500 feet. Pressure times still need padding of roughly 5 percent per 1,000 feet above 2,000. Fuzzy-logic electric rice cookers compensate on their own by extending the cycle when the pot fails to hit the temperature curve the program expects, which is one of the less-advertised reasons they outperform basic on-off models in mountain kitchens.
What Cooked Rice Yields
One cup of uncooked white rice gives you about 3 cups cooked. Brown rice runs slightly higher at roughly 3 to 3.5 cups, because the bran holds more water. Wild rice roughly triples as well.
For portioning, figure about 1/4 cup of uncooked rice per person as a side dish and 1/2 cup as the base of a main. Those numbers are per person before anything else goes in the bowl, so scale down if the rice is carrying a heavy braise.
The Short Version
Rinse it, match the ratio to both the grain and the vessel, and rest it 10 minutes before you touch it. Long-grain white is 1 : 1.5 on the stove, 1 : 1 under pressure, and whatever the fill line says in a rice cooker measured with the cooker’s own 180 ml cup. Brown rice roughly doubles the stovetop water and triples the time. Everything else is on the chart above.
If you are cooking rice more than twice a week, buy the appliance. A dedicated cooker removes evaporation, heat control, and timing from the equation in one purchase, which leaves you with exactly one variable to get right, and it is the one on this page.
Frequently Asked Questions
What is the correct rice to water ratio for white rice?
Why does a rice cooker use a different cup than a measuring cup?
Do you need less water in an Instant Pot or pressure cooker?
Should you rinse rice before cooking it?
How do you adjust the rice to water ratio at high altitude?
Related Articles
How to Use a Rice Cooker
small-appliances
How to Cook Brown Rice in a Rice Cooker
small-appliances
How Much Rice Per Person? Portions for 1 to 100 People (Chef's Chart)
small-appliances
The 9 Best Rice Cookers of 2026, Tested by a Chef
small-appliances
How to Make Sushi Rice: Ratios, the Sushi-zu, and the Four Minutes That Matter
small-appliances
About the Reviewer

Nora Whitfield, CIA Culinary Arts, ServSafe Certified
A.O.S. Culinary Arts, The Culinary Institute of America
Nora Whitfield trained at the Culinary Institute of America and spent twelve years in professional kitchens, the last four running the test kitchen for a regional restaurant group where her job was to decide which equipment could survive a dinner service and which could not. She has seasoned more carbon-steel woks than she can count, boiled water in every kettle worth owning, and broken enough cheap gear to know exactly where manufacturers cut corners. She reviews kitchen equipment the way she specified it professionally: cook on it, clean it, and see what it looks like after a month.