How to Make Sushi Rice: Ratios, the Sushi-zu, and the Four Minutes That Matter
Sushi rice done properly: rinsing, the soak argument, exact water ratios, a 4:2:1 sushi-zu in grams, and the cut-and-fan technique that makes grains gloss.
Updated
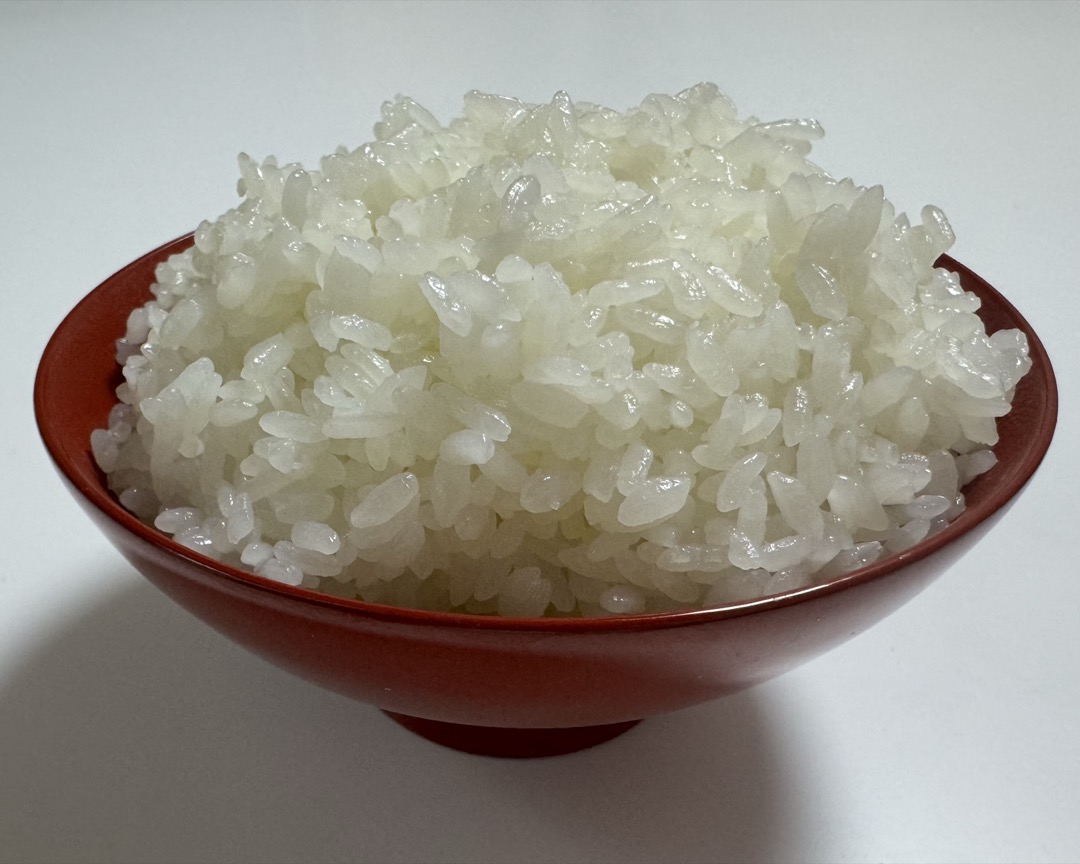
Sushi rice is not a recipe problem. Almost every version you will find prints the same handful of numbers, and most of them are close enough to work. What separates rice at a good sushi counter from rice at home is not the ratio on the page. It is what happens in the four minutes after the lid comes off, and that is technique and timing, which is much harder to write down than a list of ingredients.
I ran a restaurant-group test kitchen for four years, and sushi rice was one of the few preparations where two cooks could follow identical instructions and get results that were not remotely comparable. One produced grains that were glossy, distinct, and just tacky enough to hold a shape. The other produced seasoned porridge. The difference was never the vinegar. It was that the second cook let the rice sit in the pot while they went to find the sugar, then stirred it in circles with a metal spoon.
So this guide gives the four minutes after cooking as much space as the cooking itself, and it includes two things most guides skip: why the refrigerator specifically destroys this rice, and what the vinegar is actually doing from a food-safety standpoint.
What Actually Counts as Sushi Rice
The rice you want is a short-grain Japonica. The varieties worth knowing by name are Koshihikari, which is the benchmark, plus Akitakomachi, Sasanishiki, and Hitomebore. Grown in Japan or in California under license, they behave the same way: a short, round, opaque grain that cooks up with real gloss and a distinct cling.
That cling is starch chemistry, and it explains every other decision on this page. Rice starch is a mix of two molecules. Amylose is a straight chain that packs tightly and sets firm, keeping grains separate. Amylopectin is heavily branched, absorbs far more water, and stays soft and sticky. Short-grain Japonica runs very high in amylopectin and low in amylose, which is exactly what lets a small handful of grains hold a nigiri shape under gentle pressure instead of collapsing into paste. Long-grain rice is the reverse, which is why it is excellent for pilaf and useless here.
Most bags sold in American supermarkets under the words “sushi rice” are none of those varieties. They are Calrose or Kokuho Rose, Californian medium-grain, and I want to be plain: they work. You can make good maki, good onigiri, and respectable nigiri from Calrose, and it is what I would buy for a weeknight temaki dinner without a second thought. What you give up sits at the margins. The grain is slightly longer and slightly lower in amylopectin, so it clings a little less confidently and does not develop the same individual sheen once dressed. Side by side with Koshihikari the gap is obvious. On its own, on a plate, it is fine.
Avoid anything labeled sweet rice, glutinous rice, or mochigome. That is a different grain used for mochi, and it produces the texture of wallpaper paste.
Rinsing, and the Soak Nobody Agrees On
Rinse it. Cover the measured rice with cold water, swirl briskly with your fingers for ten or fifteen seconds, pour off the cloudy water, and repeat three or four times until it runs nearly clear. It will never run perfectly clear and does not need to.
The mechanism is simple. Milling and shipping abrade the grains against each other and leave a coat of loose, free starch on every surface. That starch is not structural; it dissolves into the cooking water, gels there, and welds the batch into a single mass. Wash it off and the grains cook as individuals, which is what you want when the cling should come from the grain surface rather than from starch glue between them.
Then drain properly, which is the step people rush. Rice carrying an unmeasured film of rinse water cannot be cooked accurately. A fine-mesh basket is the right tool and worth owning: a wide-hole colander built for pasta lets short-grain rice through the perforations, and you will lose a visible fraction of the batch down the drain. Drain in mesh, shake it, and let it sit five minutes.
Now the soak, where reliable sources openly disagree. Marc Matsumoto at No Recipes treats a 20 to 30 minute soak as non-negotiable, on the grounds that it hydrates the grain evenly before heat arrives, preventing an overcooked exterior around a firm center and producing more sheen. Gimme Some Oven tested it against an unsoaked control and dropped it, finding the difference did not survive being seasoned. Serious Eats skips the soak entirely and spends the effort on a long kombu infusion in the vinegar instead.
All three are defensible, and the trade-off is mechanical rather than mysterious: a soaked grain has already taken on water, so it needs less water in the pot. Soak without cutting the water and you get soft, wet rice, then conclude soaking is bad when what actually happened is that you added the same water to a wetter grain.
The rule I use:
- Soak 20 to 30 minutes if the rice is more than a few months past harvest, if the bag has been open a while, or if you want maximum sheen for nigiri.
- Skip it if the rice is fresh and you are making rolls, where seasoning and fillings carry the flavor anyway.
- Either way, if you soaked, cut the cooking water by about 2 tablespoons per rice-cooker cup.
Cooking It
Sushi rice is cooked slightly drier than table rice, because you are about to pour 60 ml of seasoned vinegar into it and that liquid has to go somewhere. I take the standard short-grain numbers down about 10 percent. For every other grain and vessel, the full rice to water ratio chart runs stovetop, cooker, and pressure numbers side by side.
Rice quantities below are in rice-cooker cups, the 180 ml Japanese gō. Short-grain packs at roughly 0.83 g per ml, so one cup weighs about 150 g.
| Batch | Vessel | Rice : water by volume | Rice weight | Water weight |
|---|---|---|---|---|
| 2 cups (360 ml) | Stovetop | 1 : 1.1 | 300 g | 400 g |
| 2 cups (360 ml) | Rice cooker | 1 : 1.05 | 300 g | 380 g |
| 2 cups (360 ml) | Pressure cooker | 1 : 0.95 | 300 g | 340 g |
| 3 cups (540 ml) | Stovetop | 1 : 1.1 | 450 g | 590 g |
| 3 cups (540 ml) | Rice cooker | 1 : 1.05 | 450 g | 570 g |
| 3 cups (540 ml) | Pressure cooker | 1 : 0.95 | 450 g | 510 g |
The 180 ml cup versus the 240 ml US cup is the biggest single failure point in this whole process. The plastic cup in the box with your rice cooker holds 180 ml. A US measuring cup holds 240 ml. That is a 33 percent gap, and every fill line etched inside the inner pot is calibrated to the smaller one. Measure rice with a US cup and fill water to the matching line and you are badly short of water, with hard grains on top and a scorched layer underneath. Measure with the 180 ml cup and then add water from a recipe written in US cups and you overshoot by a third and get mush. Pick one system and stay inside it for both rice and water.
A Japanese or Korean rice cooker with a dedicated sushi setting is doing something specific: it holds the pot at a warm soak temperature before bringing the water to a boil, then runs a shorter, drier cycle than the standard white-rice program. If your machine has that button, use it, and use the sushi fill line, which sits below the white-rice line for exactly the reason above.
Kombu goes in before the heat. One square of dried kelp about two inches on a side, laid on top of the water, contributes glutamate and a faint marine depth that reads as “restaurant” without reading as seaweed. Wipe it with a dry cloth rather than rinsing, since the white powder on the surface is flavor. Pull it out and discard it before the vinegar goes in.
Then rest it: ten minutes off the heat with the lid on, and this is not optional. Moisture redistributes from the saturated bottom layer up into the drier grains on top, and the starch gel sets just enough that the grains hold together instead of shredding when you disturb them. Open the pot at minute zero and you will tear a third of the batch.
Sushi-zu, and Why Every Recipe Gives a Different Ratio
The classic Japanese anchor is 4 parts rice vinegar to 2 parts sugar to 1 part salt by volume. The milder Edo-style variant runs 8 to 4 to 1.
My tested number, per 2 rice-cooker cups of uncooked rice (360 ml, about 300 g, yielding roughly 660 g cooked):
| Ingredient | Volume | Weight |
|---|---|---|
| Unseasoned rice vinegar | 60 ml (4 tbsp) | 60 g |
| Sugar | 2 tbsp | 25 g |
| Fine sea salt | heaped 1 tsp | 7 g |
Warm the three together only until the sugar dissolves. Do not boil it, because boiling drives off the acetic acid and the aroma with it. It keeps in the fridge for weeks, so a larger batch is sensible.
Read 4:2:1 as a shape, not as tablespoons. Measured literally at this batch size, a tablespoon of salt is about 18 g against 660 g of cooked rice, close to 2.7 percent, and it tastes like brine. Salt here belongs around 1 percent of the cooked weight, which is why my figure is leaner than the shorthand implies.
Recipes diverge for three real reasons, none of them anybody being wrong.
American palate sweetness. Recipes written for a US audience run sweeter, often much sweeter. Allrecipes-style versions land close to 1:1 vinegar to sugar, roughly double the sugar in my number. That is a deliberate adjustment to a market that expects sweeter rice, and if it is what you grew up eating in an American sushi restaurant, it is not an error, it is the thing you like.
Vinegar acidity varies. Unseasoned rice vinegar runs 4 to 5 percent acetic acid depending on brand, and a full percentage point is enough to make the same recipe read noticeably sharper from one bottle to the next. Taste the finished sushi-zu on its own before you commit it.
Restaurant sushi-zu is built to be tasted against fish, not alone. Rice seasoned to taste balanced by itself goes flat under fatty tuna or cured mackerel. A sushi counter’s rice tastes slightly too sharp and slightly too salty on a spoon, which is correct, because it is never eaten on a spoon.
Two shelf notes. Akazu, the amber-red vinegar brewed from aged sake lees, is the traditional Edomae choice and gives a faintly caramel, less bright profile with a light tan color. It is excellent and genuinely hard to source outside specialty importers, so most home cooks will never use it. And do not season pre-seasoned vinegar: a bottle labeled seasoned rice vinegar already contains the sugar and salt, and adding your own on top makes the batch unsalvageable.
The Cut and the Fan
This is the part almost everyone gets wrong, and it decides how the rice looks and feels.
Turn the rice out immediately after the ten-minute rest, into a wide, shallow vessel. Wide matters, because surface area is what lets it cool fast and evenly. A hangiri, the unfinished cedar tub used in Japan, works because bare wood actively wicks excess moisture out of the rice as it cools. A wide wooden salad bowl does most of that job. A rimmed sheet pan is a fine substitute and is what I use at home.
Do not do this step in the rice cooker’s own nonstick insert. Vinegar is acidic enough to attack the coating, and dragging a paddle across it while hot finishes the job. That insert is a consumable part you do not want to consume.
Pour the sushi-zu over the back of a rice paddle held just above the rice, so it fans out across the surface instead of punching a wet crater into one spot. Even distribution here is most of the battle.
Then cut, do not stir. Hold the paddle like a knife blade at roughly a 45 degree angle, slice down through the mass, and fold the rice over as you lift. Slice, fold, move to a new spot, repeat. Circular stirring crushes grains against each other, ruptures them, releases the interior starch, and turns the batch to paste, and there is no fixing that once it happens.
Fan while you cut. This gets treated as theater and it is not. As the vinegar absorbs into the hot grains, fanning flashes surface moisture off the outside of each one, and that is what produces the individual gloss that separates properly made sushi rice from wet seasoned rice. Use a paper fan, a cutting board, a sheet of cardboard, anything that moves air.
Work it down to about body temperature, roughly 95 to 100°F, over four to five minutes. Then stop, cover with a damp cloth, and leave it. Do not chase it colder. Cold sushi rice tastes flat, the aroma disappears, and the grains stiffen enough that they will not hold a shape under gentle pressure.
How Long It Keeps, and Why the Fridge Ruins It
Seasoned sushi rice is a same-day preparation, and that is starch chemistry rather than fussiness.
Cooking gelatinizes the starch: the amylose and amylopectin chains take on water, swell, and lose their crystalline packing, which is what makes the grain soft. Retrogradation is that running backwards. As the rice cools, the chains re-associate into an ordered crystalline structure and push the water back out, and the grain goes hard, dry, and chalky. The rate is temperature-dependent and runs fastest in the band of roughly 40 to 50°F.
A home refrigerator sits precisely inside that band. That is why chilled sushi rice is not merely cold, and why letting it return to room temperature does not restore it. Heat above about 140°F does partially reverse retrogradation, which is why plain white rice reheated hard with steam comes back to something decent. Sushi rice cannot use that rescue, because reheating to 140°F boils off the vinegar aroma and slumps the seasoned grains into a mass.
So hold seasoned sushi rice at room temperature under a damp cloth and use it the day you made it. Which brings us straight to the part that answer needs.
The Food-Safety Part, Short and Real
I am ServSafe certified, so I will state this plainly rather than hedging it into uselessness.
Commercial sushi operations acidify their rice deliberately, to a pH of 4.6 or below and usually targeting 4.2 to 4.3, precisely so it can legally be held at room temperature during service instead of under refrigeration. That acidity suppresses Bacillus cereus, the spore-forming organism behind what gets called fried rice syndrome. The spores survive cooking, then germinate and multiply happily in cooked rice held warm or at room temperature, and one of the toxins involved is heat-stable, so reheating does not make the food safe again.
Sushi-zu at normal home ratios brings rice into roughly the same pH range. But you are not measuring it, and pH is not something you can judge by taste, so scope the claim correctly:
- A few hours at room temperature under a damp cloth, used the same day, is normal practice and is what the vinegar is for. It is what sushi counters do all day.
- Do not hold seasoned rice overnight on the counter. Same-day means same day.
- Do not leave unseasoned cooked rice sitting out at all. It has no acid protection whatsoever, and that is the textbook B. cereus scenario.
What to Do With Leftovers
The honest answer is that seasoned sushi rice makes bad fried rice, and I would rather say so than pretend otherwise.
Fried rice wants day-old long-grain rice, refrigerated overnight on purpose. The retrogradation described above is the whole point in that dish: it firms the exterior of each grain so it can take direct high heat in a wok and separate cleanly instead of steaming into clumps. Seasoned short-grain sushi rice is the opposite grain in the opposite condition. It is high in amylopectin, so it clings when you want separation, and it already carries sugar, salt, and acid that fight everything you would season the wok with. You get a sweet, sticky, slightly sour mass.
What it is genuinely good for, same day:
- Onigiri, pressed while the rice is still near body temperature, with umeboshi, salted salmon flake, or tuna and mayo inside.
- Chirashi, the least-work option: spread the rice in a shallow bowl and lay sashimi, tamago, cucumber, and pickled ginger over the top. Buying fish to eat raw is its own skill, and my guide to finding sustainable seafood covers what to ask before you do.
- A temaki dinner, hand rolls assembled at the table, which turns the four-minute window into a meal rather than a project.
For the fillings, a food processor earns its counter space even on a small batch: it takes a cucumber down to even matchsticks faster than a knife, shreds carrot and daikon in seconds, and chops scallion and pickled ginger for a spicy tuna without turning either to mush. If you want the spicy mayo properly emulsified rather than stirred, a blender and food processor combination brings the sriracha, mayo, and a little sesame oil together into something glossy that holds instead of splitting on the rice.
The Short Version
Buy short-grain if you can find it, Calrose if you cannot. Rinse until the water runs nearly clear and drain in mesh. Cook 2 rice-cooker cups with 380 g of water in a cooker or 400 g on the stove, kombu on top, and rest it ten minutes. Dress it hot with 60 ml of vinegar, 25 g of sugar, and 7 g of salt, poured over the back of a paddle. Cut and fold, never stir, fanning as you go, until it comes down to about 95°F over four or five minutes. Cover with a damp cloth and eat it today. If you want the numbers for the rest of the grains in your cupboard, the rice to water ratio chart is the companion piece to this one.
Everything on this page is downstream of that last instruction. Sushi rice is not a thing you make in advance.
Frequently Asked Questions
What is the ratio of rice vinegar to sushi rice?
Do you add vinegar to sushi rice before or after cooking?
Why does sushi rice get hard in the fridge?
Can you use regular rice to make sushi?
Is rice vinegar the same as sushi vinegar?
Related Articles
Rice to Water Ratio: The Chart for Every Type of Rice (Stovetop, Rice Cooker, Instant Pot)
small-appliances
The 9 Best Rice Cookers of 2026, Tested by a Chef
small-appliances
Best Food Processors of 2026
small-appliances
8 Best Woks of 2026, Tested by a CIA-Trained Chef
cookware
Best Colanders of 2026
cooking-utensils
About the Reviewer

Nora Whitfield, CIA Culinary Arts, ServSafe Certified
A.O.S. Culinary Arts, The Culinary Institute of America
Nora Whitfield trained at the Culinary Institute of America and spent twelve years in professional kitchens, the last four running the test kitchen for a regional restaurant group where her job was to decide which equipment could survive a dinner service and which could not. She has seasoned more carbon-steel woks than she can count, boiled water in every kettle worth owning, and broken enough cheap gear to know exactly where manufacturers cut corners. She reviews kitchen equipment the way she specified it professionally: cook on it, clean it, and see what it looks like after a month.