How to Cook Brown Rice in a Rice Cooker
The exact ratio, the real cycle time, and why brown rice is the one grain that exposes what kind of rice cooker you actually own. Plus the fix for a machine with no brown setting.
Updated
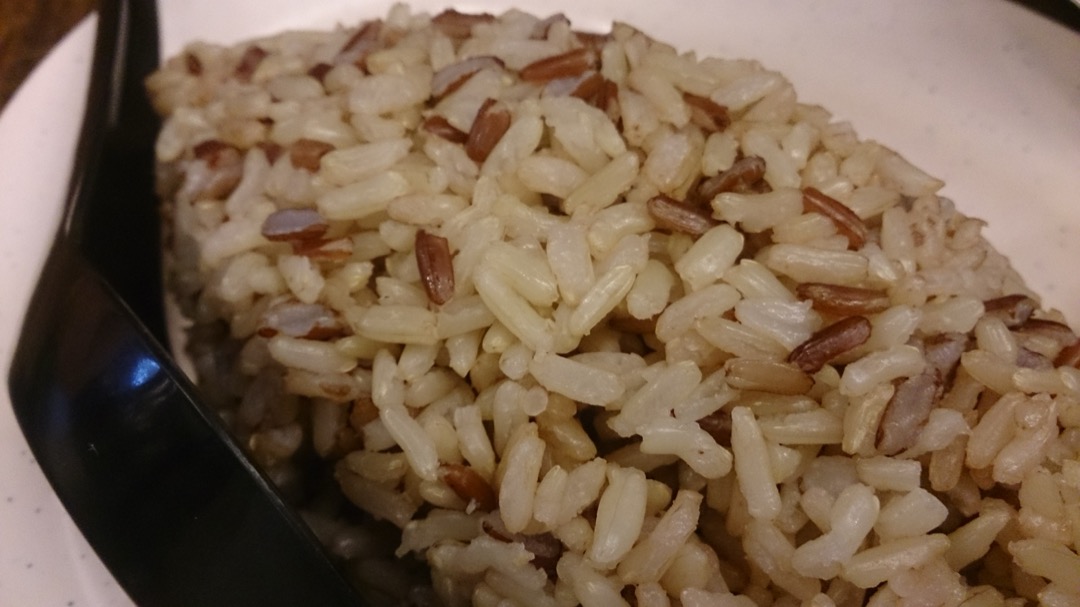
Brown rice is the grain that tells you what kind of rice cooker you actually own. White rice is forgiving enough that the cheapest machine on the shelf and the most expensive one produce a similar bowl, which is why the appliance aisle is confusing. Brown rice is not forgiving at all, and the difference between mechanisms shows up in the first batch.
The reason is a single structural fact. Brown rice is the whole grain with only the inedible outer hull removed, so the bran layer and the germ are still attached. That bran is a dense, fibrous, oil-containing sheath, and water has to get through it before the starch inside can gelatinize. White rice has had that layer polished off, which is why it hydrates quickly and cooks in twenty minutes. Everything difficult about brown rice follows from the bran, and every technique below is aimed at the same thing: giving water enough time and enough temperature to get past it.
I spent four years running a restaurant group’s test kitchen, where brown rice was on the line every day and the machines ran six or eight cycles between open and close. That volume makes the failure patterns obvious very fast, and almost all of them come from treating brown rice like white rice with a longer timer.
The Numbers, First
If you want the ratio and nothing else, here it is.
| Brown rice type | Rice cooker ratio (by volume) | Typical cycle | Rest before the lid comes off |
|---|---|---|---|
| Long-grain brown (generic, brown jasmine) | 1 : 1.75 | 80 to 110 min on a brown program | none needed |
| Short or medium-grain brown (brown Calrose, genmai) | 1 : 2 | 80 to 110 min on a brown program | none needed |
| Brown basmati | 1 : 1.65 | 80 to 110 min on a brown program | none needed |
| Either type, soaked first | subtract 2 tbsp water per cup | roughly 15 min shorter | none needed |
| Any type, basic one-switch cooker | 1 : 2, and soak first | 45 to 60 min | 15 min |
Measure the rice and the water with the same cup, whichever cup that is. Those rice cooker figures are deliberately lower than the stovetop numbers of 1 to 2 and 1 to 2.25, because a cooker holds its lid shut and vents a fraction of what an open saucepan boils away. This is the error behind a surprising number of failed batches: a recipe developed on the stovetop tells you 1 to 2, you use it in a sealed machine that evaporates almost nothing, and the extra quarter-cup has nowhere to go. Ratios do not transfer between vessels. If you want the full grid covering white, jasmine, basmati, sushi, wild, and everything else across all three vessels, it lives in our rice to water ratio guide.
Brown basmati is worth its own line because it is routinely lumped in with generic long-grain and should not be. It is a slender, lower-starch grain, and it takes slightly less water than a standard long-grain brown at the same weight.
If you would rather weigh than measure. A cup is a volume, and rice does not have a fixed density, which is why weighing is the only genuinely repeatable method. One US cup of long-grain brown rice runs about 178 g; short-grain brown runs about 191 g, since the shorter grain packs more tightly. Multiply by the ratio and use grams of water, since a gram of water is a millilitre. That is 311 g of water for a cup of long-grain, 382 g for a cup of short-grain. A scale also sidesteps the entire cup problem below.
The 180 ml Cup Ruins More Brown Rice Than Any Other Mistake
The plastic cup in the box is not a measuring cup. It holds 180 ml, a Japanese unit called a gō, and a US measuring cup holds 240 ml. That is a 25 percent gap, and it does more damage to brown rice than to white because brown rice already sits at the wet end of the range. Overshoot a 1 to 2 ratio by a third and you have not made slightly soft rice, you have made porridge.
There is a second trap specific to brown rice. On most fuzzy-logic cookers, the inner pot carries two separate sets of etched fill lines, and they are frequently on different sides of the pot or in different colors. One set is for white rice and one is for brown or mixed grain, and the brown lines sit noticeably higher for the same numbered cup. People fill to the white line, run the brown program, and get a hard center they then blame on the machine. Look inside your pot before the next batch and find out which set of lines you have been using.
Pick one system and stay in it. Either measure rice with the cooker’s own cup and fill water to the brown line matching the number of cups you added, or ignore the lines completely and measure both with the same US cup at the ratio in the table. Half of each does not work.
Why the Program Matters More Than the Ratio
There are three mechanisms sold under the name “rice cooker,” and brown rice separates them harshly. We break the tiers down machine by machine in our best rice cookers roundup, and the summary version below is the part that matters for whole grain.
A one-switch cooker has no brown program and cannot have one. Its entire brain is a spring-loaded switch held down by a small magnet whose alloy loses its magnetism just above the boiling point of water. While there is free water in the pot the contents cannot exceed 212F, so the magnet holds and the switch stays down. The moment the last free water is gone the pot temperature spikes, the magnet releases, and the machine clicks to warm. It does not know what grain is in there and it cannot hold a soak, because a soak requires deliberately staying warm and wet, which is the one state this design has no way to command.
A fuzzy-logic cooker’s brown program is mostly soak. The microprocessor holds the pot at a warm, well-below-boiling temperature for 30 to 45 minutes before the cook proper ever starts, and that stage is what actually drives water through the bran. Then it boils, then it holds a steam stage after the free water is gone to let residual heat finish the center, then it rests. This is why the machine sits there apparently idle for the first stretch of a 100-minute cycle, and why people who cancel it out of impatience get exactly the chalky center the soak was preventing.
An induction cooker heats the pot itself rather than a plate under it, so heat comes from the sidewalls as well as the base. For white rice that is a refinement. For brown rice and for large batches it is a genuine difference, because the grain nearest the wall hydrates on the same schedule as the grain in the middle instead of lagging behind it.
The practical upshot: if you eat brown rice more than occasionally, the brown program is the feature worth paying for, and it is the clearest justification for stepping up from the cheapest tier.
Making a One-Switch Cooker Do It Anyway
You can cook good brown rice on a basic machine. You simply have to perform the soak yourself, because the cooker cannot.
Rinse the rice, put it in the inner pot with its full measured cooking water at 1 to 2, and leave it on the counter for an hour before you press anything. The grain hydrates at room temperature during that hour, which is slower than a warm soak but accomplishes the same thing. Then run the normal cycle.
Two things to expect. First, the cooker may click to warm while the center is still firm, because it is measuring evaporation rather than doneness. Do not lift the lid and do not add cold water. Give it 15 minutes shut, then check. If it is genuinely undercooked, add a quarter cup of hot water, stir once, close it, and press the switch down again. A second press is normal on this class of machine and not a defect.
Second, watch the bottom. A brown rice cycle runs the pot dry for far longer than a white one, and that extended dry heat is where scorching happens. It is worse on a rice cooker with a stainless steel inner pot, where there is no nonstick coating between the starch and the metal. If that is your pot, add about two tablespoons of water per cup beyond the table above and make sure the rinse was thorough, because dissolved surface starch is what welds itself to bare steel.
Rinsing and Draining
Rinse brown rice briefly, and understand that you are doing a different job than you do with white rice.
White rice is rinsed to strip loose surface starch left by milling, which is what makes cooked white rice gluey and what foams out of the steam vent. Brown rice still has its bran on, so there is very little bare starch exposed, and the water will never run clear no matter how long you stand at the sink. What you are removing is bran dust, field grit, and any surface oil that has begun to turn. Two or three changes of water, swirling for about half a minute each time, is plenty, and there is no point continuing past that in the hope of clear water you are never going to get. Fifteen seconds under a running tap, which is what several popular recipes suggest, is not enough to carry the grit away.
Drain it properly. Brown rice picks up water faster than people assume, and grain that goes into the pot dripping carries liquid you did not measure and cannot account for. A fine mesh colander with a good shake handles it. If you rinsed in a bowl and the rice sat in the water for several minutes, take two tablespoons per cup off the cooking water to compensate.
Soaking Is Optional and Almost Always Worth It
Even on a machine with a proper brown program, soaking before the cycle changes the result. It softens the bran, produces a more evenly hydrated grain, and cuts roughly 10 to 15 minutes off the run. Reduce the cooking water by about two tablespoons per cup to account for what the grain already absorbed.
Thirty to forty-five minutes is the working band manufacturers recommend for brown rice, against 15 to 30 for white. A full hour does no harm and is what I default to, mostly because it is easier to remember than a range. Past about two hours at room temperature you are into territory where the grain starts to ferment slightly in warm weather, so soak longer than that in the fridge or not at all.
If your cooker has a GABA or germinated setting, that is a different operation, not a longer soak. It holds the grain at about 104F for two hours before the normal cycle even begins, which is warm enough to start the seed germinating rather than merely hydrating it. Germination raises the grain’s gamma-aminobutyric acid content and yields a softer, slightly sweeter result. The effect is real but modest compared with laboratory germination protocols, which run far longer. Use the setting if you like the texture. Do not start it when you want dinner in an hour.
The Variable Nobody Mentions: How Old Your Rice Is
This is the cause I check when a batch fails for no visible reason, and it is almost never discussed.
Brown rice still has the germ and the bran, and both contain oil. Oil goes rancid. White rice, stripped of both, keeps for years in a cupboard, while brown rice holds its quality for roughly six months at room temperature and closer to a year refrigerated. Rancidity is the flavor problem, and it presents as a faint stale or crayon-like note that people often blame on the water.
The cooking problem is separate and more useful to know: as brown rice ages and dries, it resists water measurably. Grain that has been in the pantry for a year needs more liquid and more time than the same rice needed when it was fresh, and the cooker’s program has no way to detect this. If your brown rice has drifted toward hard centers over time and nothing about your technique changed, the rice changed. Add a couple of tablespoons of water per cup, and buy in quantities you will actually finish. Keep the open bag in the fridge or freezer if you go through it slowly.
Resting, Fluffing, and Keeping It Warm
Whether brown rice needs a rest depends on the machine, and most guides get this wrong by prescribing one number for everyone.
A fuzzy-logic or induction cooker already rested it. The steam-and-rest stage is built into the end of the program, which is part of why the cycle is so long. When the tune plays, the rice is finished. You can fluff it immediately, and letting it sit an extra 15 minutes on warm only starts drying it.
A basic one-switch cooker did not rest it, because it has no concept of a stage after the water is gone. It clicks to warm the moment the pot goes dry, with the center of the grain still catching up on residual heat. Give that machine 15 minutes with the lid shut before you open it. This single step fixes a lot of one-switch brown rice that gets blamed on the ratio.
Either way, fluff with a paddle or a fork, lifting from the bottom rather than stirring, which would mash the grains against each other.
Keep-warm is safe but harder on brown rice than on white. Holding around 140 to 165F sits above the food-safety floor, so the rice is not becoming hazardous, and manufacturers generally rate the function for up to 12 hours. Quality is the real limit and it arrives long before that. The exposed bran dries and stiffens faster than a polished white grain does, and the surface goes leathery within a few hours, so brown rice is best eaten within about three. Beyond that, get it into the fridge in a shallow container so it cools fast.
Leftovers are worth planning for. One cup of dry brown rice yields roughly 3 to 3.5 cups cooked, slightly more than white, since the bran holds more water. Cold, day-old brown rice is the correct starting material for fried rice, because straight-from-the-cooker rice is too moist and will steam rather than fry. The frying itself wants a hot wok, or, if your range cannot deliver the heat, an electric wok with the element wrapped around the bowl rather than sitting under it. Brown rice actually fries better than white in one respect: the intact bran keeps the grains separate under the spatula.
Altitude and Hot-Start
Two adjustments for specific situations.
Above roughly 3,000 feet, water boils cooler, the grain hydrates more slowly, and brown rice suffers more than white because it needed the time anyway. Add about two tablespoons of water per cup and expect a longer cycle. A fuzzy-logic cooker will stretch its own run to compensate; a one-switch machine will not.
On a basic cooker, starting with hot water rather than cold shortens the run by cutting out the climb to boiling. Bring the measured water to a boil in an electric kettle with a temperature readout, pour it over the soaked rice, and press the switch. It removes eight or ten minutes and, more usefully, it gets the grain into the hydrating temperature range faster. Do not do this on a fuzzy-logic cooker, whose program is expecting to start cold and will read a hot pot as further along the curve than it really is.
The Short Version
Rinse briefly, soak 30 to 60 minutes if you can, use 1 to 1.75 for long-grain and 1 to 2 for short-grain measured with a single cup, and run the brown program if your machine has one. If it has one, fluff at the beep, because the rest is already in the program. If it does not, the soak stops being optional, you rest it 15 minutes yourself, and a second press of the switch is normal rather than a fault. And if the rice has been in the cupboard since last year, give it more water than the chart says, because it is not the same rice you bought.
For the mechanics of the appliance itself, the buttons, and the three parts nobody cleans, see our guide on how to use a rice cooker.
Frequently Asked Questions
How long does brown rice take in a rice cooker?
What is the water ratio for brown rice in a rice cooker?
Can you cook brown rice in a rice cooker with no brown rice setting?
Do you have to rinse brown rice before cooking it?
Why is my brown rice still hard in the middle?
Related Articles
How to Use a Rice Cooker
small-appliances
Rice to Water Ratio: The Chart for Every Type of Rice (Stovetop, Rice Cooker, Instant Pot)
small-appliances
The 9 Best Rice Cookers of 2026, Tested by a Chef
small-appliances
The 9 Best Stainless Steel Rice Cookers of 2026, Tested by a Chef
small-appliances
How to Use an Aroma Rice Cooker
small-appliances
About the Reviewer

Nora Whitfield, CIA Culinary Arts, ServSafe Certified
A.O.S. Culinary Arts, The Culinary Institute of America
Nora Whitfield trained at the Culinary Institute of America and spent twelve years in professional kitchens, the last four running the test kitchen for a regional restaurant group where her job was to decide which equipment could survive a dinner service and which could not. She has seasoned more carbon-steel woks than she can count, boiled water in every kettle worth owning, and broken enough cheap gear to know exactly where manufacturers cut corners. She reviews kitchen equipment the way she specified it professionally: cook on it, clean it, and see what it looks like after a month.