How to Use a Wok
Stir-frying is a heat management problem before it is a recipe. A chef gives the batch sizes, cook order, timings and motion that work on a home burner.
Updated
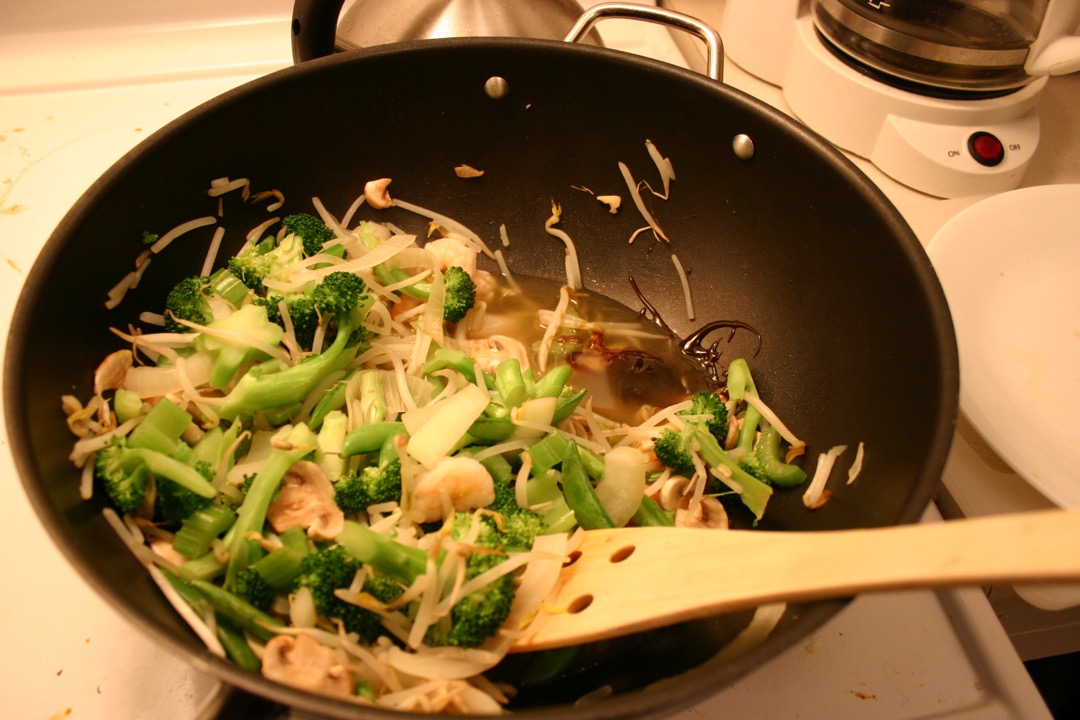
A stir-fry is over in about three minutes, and almost every decision that determines how it turns out was made before the burner was lit. That is the thing that separates it from nearly everything else you cook. There is no simmer to correct in, no oven to hide a mistake in, and no point at which you can go back to the cutting board. The cooking is fast. The setup is not.
I ran a restaurant group’s test kitchen for four years, a good part of it standing over commercial wok ranges, and I have spent longer than that cooking stir-fries on ordinary domestic burners. What I have learned from the second half is more useful than the first. Restaurant heat lets you get away with sloppy batch sizes and vague timing. A home range does not, and most of the advice online is written as though it will.
This page is the operating manual for one job: stir-frying, on the stove you actually own. Seasoning a new wok is a different process and it is covered in how to season a wok. Cleaning it, and fixing rust or a tacky surface, is in how to clean a wok. The chemistry behind the smoky character everyone is chasing, and what a home burner can and cannot reach of it, is worked through in wok hei. A wok also steams, deep-fries at around 375°F, smokes and braises well, and those are separate jobs with separate rules rather than part of this one. They are covered one by one in what a wok is used for.
Set the Wok Up on the Stove You Have
Before anything else, look at how the pan sits.
A round-bottom wok belongs on a gas burner with a wok ring, and the ring is not optional in the way most guides imply. Sitting a loaded round-bottom bowl on a flat grate leaves it balanced on a contact patch the size of a coin, with a long handle sticking out on one side pulling it off centre. Two pounds of food and hot oil at chest height on a pan that can rotate freely is a burn waiting for a moment of inattention, and I have seen it happen twice. Every article I read while researching this one framed round versus flat purely as a question of heat output. It is also a question of whether the pan tips. If your ring lets the wok rock at all when you push the rim, turn it over: most rings are reversible, with a narrow and a wide end, and one orientation seats a given bowl much better than the other.
A flat-bottom wok solves the stability problem and costs a little sidewall heat, which is the right trade in most Western kitchens. Our wok roundup goes through gauge, diameter and handle style in detail, and 14-gauge carbon steel at around 2mm is the default for good reasons: thin enough to respond to the burner within seconds, thick enough not to stall the moment cold food lands.
Cast iron is the interesting exception on a weak burner. It responds slowly, which is normally a fault in this application, but it holds a great deal more energy for its mass, so it does not crater when you add food the way thin steel does. If your range is genuinely feeble and you have accepted that you will never toss the pan, the thermal mass of a cast iron wok buys back some of the recovery your burner cannot supply. It is heavy, it takes five minutes to preheat instead of two, and it is a real option rather than a consolation prize.
Electric, Induction and Glass Tops
Here the sources genuinely disagree, and it is worth adjudicating rather than averaging.
Serious Eats, Inquiring Chef and Andrea Nguyen all treat “buy a flat-bottom wok” as the whole answer for a flat cooking surface. Hot Thai Kitchen disagrees, arguing that flat-bottom woks still warp quickly on flat electric and induction and recommending a portable gas ring or a dedicated induction wok unit instead. De Buyer adds a separate warning that the forward-and-up wrist flick used to toss food can crack or scratch a glass ceramic top, so you should use the spatula.
My reading is that they are describing different surfaces and both are right about theirs. On an exposed coil element, a flat-bottom carbon steel wok is fine, and the coil’s uneven contact is a smaller problem than people expect. On glass ceramic radiant and on induction, two things bite. Thin steel over a hot disc with cool walls above it warps, because the metal expands unevenly, and a warped base then sits badly on the very surface that demanded a flat base in the first place. And the surface cannot take the motion. So on a glass top: flat-bottom wok, no tossing at all, spatula only, and accept that you are running a very good sauté rather than a stir-fry.
If you cook stir-fries weekly on a glass or induction range, stop working around the stove and change the heat source. A portable propane ring outdoors is the cheapest route to real heat. Indoors, this is exactly the situation our electric wok roundup exists for, where the element wraps the bowl rather than sitting under a disc of it. That roundup separates the sealed nonstick units from induction wok cooktops, because they are two different machines with two different ceilings.
Is My Burner Hot Enough? The Test That Replaces the Clock
Preheat times in print vary by a factor of five. De Buyer says oil smokes after around ten minutes of preheating. Nearly everyone else implies one to three. That spread is not a disagreement about technique, it is an unstated assumption about equipment, and averaging the two numbers gives you a figure that describes nobody’s stove.
Preheat time is a function of three things: burner output, the mass and gauge of the pan, and whether the pan is dry and empty. A 2mm carbon steel wok on a 12,000 BTU gas burner is ready in two to three minutes. The same wok on a 7,000 BTU sealed burner takes closer to six. A cast iron wok on that same weak burner can honestly need ten, which is very likely the situation de Buyer’s figure describes.
So use tests, not a stopwatch. In order of reliability:
The water bead. Flick a few drops onto the dry preheated metal. On a hot, properly seasoned surface they pull into tight spheres and skitter across the steel on a cushion of their own vapour, which is the Leidenfrost effect. If they spread flat and boil in place, the pan is not there yet.
The first wisp. Watch the bare dry surface. The moment you see faint vapour lifting off the metal itself, before any oil is in the pan, the wok is at working temperature.
The oil behaviour. Correctly timed oil sheets out and thins the instant it hits the metal, running up the sides when you swirl it. Oil that sits in a thick lazy puddle is telling you the pan is cool.
And there is a fourth test, which happens after the food goes in and is the honest diagnostic for a weak stove. Listen. A wok at searing temperature makes a hard continuous crackle when food lands. A wok that only hisses briefly and then goes quiet has dropped below the range where anything browns. That quiet is the sound of a stir-fry becoming a braise, and the fix is always the same: get the food out, let the pan come back, cook in two goes.
Mise en Place, Which Is Most of the Work
Everything gets cut, measured and lined up before the burner is lit. No exceptions, no last-minute chopping, no reaching into the fridge mid-cook.
Cut every component to a size that matches its cooking time, which usually means the slow things are thinner than the fast things. Uniformity within each component matters more than any particular thickness. A stir-fry where the carrot is cut in three different thicknesses cannot come out right, and cooking longer widens that gap instead of closing it, because the thin pieces are being overcooked the entire time the thick ones catch up.
Mix the sauce in a small bowl and leave a spoon in it. Cornstarch settles out of a mixed sauce within about a minute, so it needs a re-stir immediately before it goes in. Measure the oil out too, including the extra tablespoon you will add when the pan restarts for the vegetables.
Two pieces of equipment save real time here. If you are julienning enough vegetables for a family batch, a slicing disc turns ten minutes of knife work into about fifteen seconds, which is most of the argument for the machines in our food processor roundup. And blanched greens or rinsed noodles have to be drained properly, because anything that goes into the pan carrying surface water cools it and steams instead of searing. Let a colander do that job rather than a plate and a paper towel, and give it a couple of minutes to actually drip.
Start the rice first. A stir-fry finishes in three minutes and rice takes twenty-five, so the rice has to be running before you begin. A rice cooker earns its counter space here specifically because it finishes on its own schedule with no attention from you, and it will hold at temperature while your hands are on the wok.
Batch Size, With Actual Numbers
This is where home stir-fries fail most often, and it is the part of the internet with the least usable information in it. The published figures are a ceiling of about one pound of meat on a home range, from Serious Eats and Grace Young, and a working figure of 12 ounces in a 14-inch wok. That is the entire numerical guidance available, and it covers one pan size and one ingredient type.
Below is how I scale it in a test kitchen. The 14-inch protein figures are the published ones. Everything else in this table is my own scaling from them, not a published number, worked out on domestic burners over a lot of dinners, and you should treat it as a starting point to adjust rather than a specification.
| Wok diameter | Protein per batch | Prepped vegetable per batch | If the burner is weak |
|---|---|---|---|
| 14 inch | 12 oz working, 1 lb absolute ceiling | About 4 cups loose | Cut both figures by a third |
| 12 inch | 8 oz | About 3 cups loose | Cut both by a third |
| 10 inch | 6 oz | About 2 cups loose | Cook one component at a time |
Vegetables scale by volume rather than weight because what matters is how much cold surface area lands on the metal at once and how much water comes off it. Four cups of loose prepped vegetable is roughly what fills a 14-inch bowl to the point where you can still see metal between the pieces, and that visible metal is the whole test. If the food forms a continuous layer, the batch is too big.
The weak-burner column is the part nobody writes down. If your range is under about 9,000 BTU, or you are on a glass top, the correct response to a big dinner is more batches rather than a longer cook. Two batches that sear take about ninety seconds longer in total than one batch that stews, and the difference in the result is not subtle.
Cook Order, Timing, and What to Change on a Weak Stove
The consensus order is right: aromatics, then protein, then hard vegetables, then soft vegetables, then sauce. The useful version adds times, and the only source I found that publishes minute ranges is Inquiring Chef. Their figures are protein 4 to 7 minutes, aromatics about 1 minute, hard vegetables 6 to 7 minutes, medium and soft vegetables 3 to 4 minutes, sauce about 2 minutes, with a tablespoon of oil re-added each time the pan restarts on a new component.
Those are sound numbers for a decent burner. They are the wrong numbers for a weak one, and the correction is not what people expect.
| Stage | Standard timing | Weak burner adjustment |
|---|---|---|
| Dry aromatics | About 1 minute | 20 to 30 seconds, and add them to the oil rather than the bare pan |
| Protein | 4 to 7 minutes | Two batches of 2 to 3 minutes, removed between them |
| Hard vegetables | 6 to 7 minutes | Blanch or par-steam first, then 2 minutes in the wok |
| Soft vegetables | 3 to 4 minutes | Unchanged, but in a smaller quantity |
| Sauce | About 2 minutes | 60 to 90 seconds, added to a pan you have let recover |
The principle behind every line of that column: do not extend the clock, reduce the load. A weak burner cannot hold searing temperature under a heavy pan of food, so leaving hard vegetables in for nine minutes instead of seven does not sear them harder. It steams them for two extra minutes. Blanching a carrot or a broccoli stem in boiling water for ninety seconds, draining it thoroughly, and then giving it two minutes in a screaming wok gets you a cooked-through vegetable with browned edges, which is the thing the long stir-fry was trying and failing to produce.
Re-add a tablespoon of oil at each restart. This is not about the food sticking. Oil that has been through a stage of cooking has partly broken down, and fresh oil going onto hot metal a moment before new food lands is what generates the aromatic compounds you want. The chemistry behind that is in wok hei, and it is the reason the sequence is always oil then food rather than food into standing oil.
The Motion Is Shoveling, Not Stirring
The tool is a wok chuan, the long-handled shovel-shaped spatula with a curved leading edge that matches the radius of the bowl. A fish spatula is the best common substitute and a wooden spoon is a distant third, because a spoon has no edge to get under food with.
The motion is a scoop. Push the edge down the slope until it meets the base, run it along the bottom to get under the food, then lift and turn the load over against the far wall. Repeat continuously. What you are doing is bringing raw pieces down into the searing base while pushing seared pieces up the cooler sidewall to park, and that two-zone shuffle is the whole point of a bowl-shaped pan. Cooking in the flat bottom four inches, which is what most home cooks do, wastes half the tool.
Tossing is a separate technique and it is conditional. On a round-bottom wok over gas, the curve of the bowl returns airborne food to the centre, the motion is a forward slide plus a rock, and it works. On a flat-bottom wok the geometry is against you: a flat base with a discontinuity where it meets the wall does not funnel food back the same way, so a proportion of what you throw lands on the burner. Toss a flat-bottom wok gently or not at all. On a glass top, do not toss at all, per de Buyer’s warning about the surface.
For larger pieces, a shovel is the wrong instrument. Chicken thigh, whole prawns, thick slices of pork belly all want to be turned individually rather than tumbled, and a long well-sprung pair of tongs does that with far more control while keeping your hand well clear of a rim running past 600°F. For placing anything delicate at the end, thinly sliced chilli, whole herb leaves, a scattering of scallion greens, kitchen tweezers beat fingers over a hot pan.
Aromatics: Dry, Paste, and Liquid
Aromatics get treated as one category in every guide I read, and they behave in three completely different ways. Getting this wrong is the most common cause of a stir-fry that tastes acrid.
Dry aromatics are garlic, ginger, scallion whites, dried chilli. They go into hot oil, not onto bare metal, and they have a window of roughly twenty to forty seconds before they burn. Use the sizzle test: drop one piece of garlic in first. It should sizzle steadily and turn pale gold over several seconds. If it browns instantly and the edges darken, the oil is too hot, so pull the pan off the heat for a count of five before the rest goes in. Burnt garlic is bitter through the whole dish and cannot be corrected later.
Paste aromatics are fermented bean pastes, chilli bean paste, doubanjiang, shrimp paste, curry pastes. These need a brief bloom, meaning thirty to sixty seconds in oil over moderate heat, pressed against the pan with the back of the spatula until the oil around them turns red or brown and the raw fermented smell turns round and savoury. Straight into a screaming pan they scorch, and dropped in at the end with the sauce they taste raw and flat. They are the one component that wants the heat turned down for a moment.
Liquid aromatics are the ones almost nothing on page one explains. Shaoxing wine, rice wine, sometimes soy or vinegar, poured in a thin stream around the rim of the wok rather than into the middle. The technique is 烹, peng, and the reason for the rim is that the sidewall is the hottest dry metal in the pan. The liquid hits it, flashes to vapour almost instantly, and the vapour carries through the food above. Poured into the middle it just lands on cool food and pools. This is also where a splash of moisture leaving the pan under high heat does useful work, which is the mechanism explained in wok hei.
Sauce at the Rim, and Getting It to Cling
Sauce goes in last, into a pan that is still hot, and it goes around the rim in the same way. Re-stir it first, because the cornstarch has settled.
Then keep everything moving for sixty to ninety seconds. A cornstarch-thickened sauce goes through a visible transition: cloudy and thin, then suddenly glossy and clinging, and that gloss is your signal to stop. Sauce sitting as a pool in the bottom of the serving bowl means one of two things. Either the pan had already stalled and the sauce is boiling rather than reducing, or there was too much of it for the amount of food. A stir-fry sauce should be a thin glaze on the ingredients, not a liquid they are sitting in.
If the pan has genuinely stalled, adding sauce will not rescue it. Tip the batch out, let the wok come back up to smoking, and finish it in two goes.
Velveting, and the Thing That Gets Called Velveting
Grey, rubbery chicken and chewy beef are the most common complaints about home stir-fries, and there are two distinct fixes for them. They are constantly conflated, they work by different mechanisms, and they suit different situations.
True velveting is a marinade plus a par-cook. A standard starting ratio is one egg white and about a tablespoon of cornstarch per pound of thinly sliced meat, often with a teaspoon of oil, a splash of rice wine and a pinch of salt, marinated for twenty to thirty minutes. The meat is then par-cooked separately, either passed through moderately hot oil at around 275 to 300°F for thirty to forty-five seconds, or blanched in barely simmering water for the same, drained thoroughly, and set aside. It goes into the stir-fry at the very end just to be coated in sauce. The egg white and starch form a coating that sets around each piece and insulates it, so the meat cooks gently and stays genuinely silky. This is the restaurant texture, and it is worth the extra pan.
The water massage is the technique The Woks of Life describes, and it is a different thing. One to one and a half tablespoons of water is massaged into half a pound of sliced meat until the meat absorbs it completely, then it rests for ten to fifteen minutes, usually followed by cornstarch and a little oil. There is no egg white and no par-cook. The mechanism is hydration: the muscle holds that added water through cooking, so thin slices that would otherwise dry out in ninety seconds stay juicy.
When to use which. The water massage is the right choice for a fast weeknight stir-fry with thinly sliced beef or chicken going straight into the wok, because it costs fifteen minutes of resting and no extra equipment. Full velveting is the right choice when you want the silky restaurant texture, when the meat is going into a sauce-heavy dish, or when your burner is too weak to sear protein properly, since the par-cook takes the searing job away from the wok entirely. Oil-blanching is awkward on a domestic range because holding a pan of oil at 300°F is fiddly, so water-blanch instead. Either way, drain hard before the meat goes back in.
Reading the Failures
Almost every stir-fry problem shows itself while you are cooking, and each has a specific cause.
| What you see | What it means | What to do |
|---|---|---|
| Food turns grey, liquid pools, the pan goes quiet | Overcrowded, or the burner cannot hold temperature | Remove everything, reheat the wok, cook in two batches |
| Garlic and ginger dark brown in seconds, bitter finish | Oil too hot when the aromatics went in | Sizzle-test one piece first, and pull the pan off the heat for five seconds |
| Protein welded to the base | Pan under-preheated, or the food was moved too early | Preheat to the water-bead test, then leave it still for a minute before shoveling |
| Vegetables charred outside and raw inside | Pieces too thick for the time available | Cut thinner, or blanch the hard ones first |
| Sauce watery and sitting in the bowl | Cornstarch settled out, or too much sauce for the food | Re-stir immediately before pouring, and reduce the quantity |
| Everything tastes acrid and slightly burnt | Oil sat in the hot empty pan too long, or you are cooking in spent oil | Preheat dry, add oil seconds before the food, and add fresh oil at each restart |
The first row is the important one. Greying and steaming is the universal signal of insufficient heat at the food, and it does not tell you which of the two causes is responsible. Halve the batch first, because that is free. If it still greys with half the food in the pan, the burner is the limit, and the answer is blanching, par-cooking, or a different heat source.
Finishing and Plating
Get the food out of the wok the moment it is done. A wok holds enough energy to keep cooking for another thirty seconds after it leaves the burner, and greens in particular go from bright and snapping to olive and limp in that window.
Plate onto a wide warm plate rather than into a deep bowl. A bowl traps steam under the food and softens everything you just spent three minutes crisping, which is the same reason takeout in a closed container never tastes the way it did in the kitchen. Serve immediately. Nothing about a stir-fry improves while it waits.
Then clean the wok while it is still hot, because the residue lifts in seconds now and grips like glue in twenty minutes. Hot water, a bamboo brush, tip out, back onto the burner to dry, and a few drops of oil wiped on and straight back off. The full routine, including what to do about burnt-on crust and rust, is in how to clean a wok.
The Short Version
- Check how the pan sits before you check anything else. A round-bottom wok needs a properly seated ring, and a loaded one on a bare grate can tip.
- On glass ceramic or induction, use a flat-bottom wok, never toss, and consider changing the heat source rather than the pan.
- Preheat dry and empty, and use a test rather than a clock. Water beads that skitter, or the first wisp of vapour off bare metal.
- Hot wok, cold oil, food within seconds. Oil left in a preheated pan is spent before the food arrives.
- Cut everything, mix the sauce, and line it up before you light the burner. There is no pause in a three-minute cook.
- Twelve ounces of protein in a 14-inch wok, less in a smaller one, and less again on a weak burner. If you cannot see metal between the pieces, the batch is too big.
- Aromatics, protein, hard vegetables, soft vegetables, sauce, with a tablespoon of fresh oil at each restart.
- On a weak stove, reduce the load rather than extending the time. Blanch the hard vegetables instead of stir-frying them longer.
- Shovel, do not stir. Raw pieces down into the base, seared pieces up the wall to park.
- Dry aromatics into oil for under a minute, pastes bloomed for thirty to sixty seconds, liquids poured down the hot rim.
- Grey food and a quiet pan means too much in the wok or not enough heat under it. Halve the batch before you blame the stove.
- Plate onto a warm flat plate, serve at once, and clean the wok while it is still hot.
None of this requires a restaurant burner. It requires cutting first, cooking less at a time, and being willing to stand there for three minutes doing nothing but moving food.
Frequently Asked Questions
How do you use a wok for beginners?
Do you heat the wok before adding oil?
What should you not cook in a wok?
What are the most common wok cooking mistakes?
Do I need a wok to stir fry, or can I use a skillet?
Related Articles
About the Reviewer

Nora Whitfield, CIA Culinary Arts, ServSafe Certified
A.O.S. Culinary Arts, The Culinary Institute of America
Nora Whitfield trained at the Culinary Institute of America and spent twelve years in professional kitchens, the last four running the test kitchen for a regional restaurant group where her job was to decide which equipment could survive a dinner service and which could not. She has seasoned more carbon-steel woks than she can count, boiled water in every kettle worth owning, and broken enough cheap gear to know exactly where manufacturers cut corners. She reviews kitchen equipment the way she specified it professionally: cook on it, clean it, and see what it looks like after a month.