How to Season a Cast Iron Skillet
Cast iron seasoning is polymerized oil bonded to metal. A chef explains thin coats, smoke points, oven temperatures, and how to fix a sticky or flaking pan.
Updated
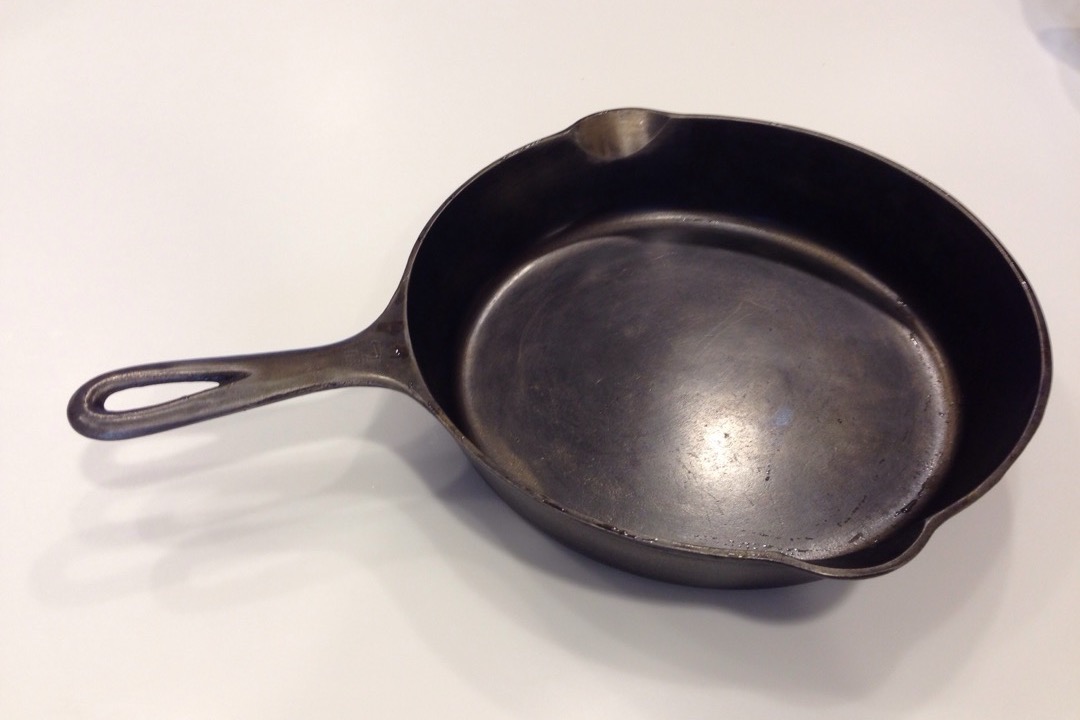
A cast iron skillet arrives from the factory with a thin brown coating on it, and within a month most home cooks have either turned that coating into something slick and black or turned it into something sticky, blotchy, and peeling. Skill has very little to do with which way it goes. The deciding factor is whether you understand what that coating actually is, because almost every set of instructions on the internet describes it wrong, and once you carry the wrong mental model every decision downstream is wrong too.
I ran the test kitchen for a restaurant group for four years, which meant I was the person who decided whether a pan stayed in the rotation or went in the bin. I have seasoned more cast iron and carbon steel than I care to count, stripped a lot of it back to bare metal, and watched line cooks do everything to those pans that you are told never to do. Most of the rules you have heard are folklore. A few of them are chemistry, and those are the ones that matter.
This is the whole process: what seasoning is, which oil to use and why, how to strip a pan that is beyond saving, the initial cycle with real temperatures and times, what to do after every single cook, and how to read a finish that has gone wrong.
What Seasoning Actually Is
Seasoning is polymerized oil. When you heat an unsaturated fat past the point where it begins to break down, the double bonds in its fatty acid chains generate free radicals, those radicals attack neighboring chains, and the molecules cross-link into a continuous three-dimensional network. The result is a hard, dry, plastic-like film chemically bonded to the iron surface through iron-oxygen-carbon linkages. It is the same reaction that makes linseed oil dry into a hard finish on wood and makes oil paint set on canvas.
That film is a few molecules thick per coat. It is not grease. It is not a layer of fat sitting in the pan waiting to be washed away, and it is not oil that has soaked into the metal, because cast iron is not porous in any meaningful sense. What cast iron has is surface texture: modern sand-cast pans have a pebbled finish, and vintage Griswold and Wagner pans were machine-milled smooth. Both hold seasoning. The rough one just takes a few more cycles before it feels slick, because the polymer has to fill in the low spots before the high spots start behaving like a continuous surface.
Once you accept that seasoning is a cured polymer, the folklore collapses on its own. A detergent cannot dissolve a polymer. A chainmail scrubber cannot scrub off something bonded at the molecular level. And a coat of oil that never got hot enough to cross-link never became seasoning at all, which is why it stays tacky forever.
Why Thin Coats Are the Whole Game
The number one failure in home seasoning is applying too much oil, and it is not close. A visibly wet coat cannot cure properly. The oil at the surface polymerizes and skins over, the oil underneath is cut off from oxygen and stays liquid, and what you end up with is a hard shell over a soft layer. That structure has no integrity. It goes tacky, it picks up dust, and eventually it shears off in sheets when the pan expands and contracts.
The instruction that actually works sounds wrong the first time you hear it: oil the pan, then wipe it back off until it looks like bare metal. Use a clean lint-free cloth or a fresh paper towel and keep going until the surface reads matte and dry and slightly grey. There is still oil on it. There is a microscopically thin film left behind in the surface texture, and that film is all you need, because a single cure produces a layer measured in molecules regardless of how much oil you started with. Extra oil does not make a thicker layer. It makes a worse one.
Six thin coats give you a pan that is genuinely non-stick. One thick coat gives you a pan you will have to strip.
Choosing an Oil: Smoke Point and Iodine Value
Two numbers decide whether an oil is a good choice, and most guides only mention one of them.
Smoke point tells you the temperature at which the oil starts breaking down, and that breakdown is the beginning of polymerization. Your oven has to get hotter than the smoke point or the oil never cures. It just sits there, slowly oxidizing into something rancid and sticky. The practical rule is to set the oven at least 25 to 50°F above the oil’s smoke point.
Iodine value measures how unsaturated the oil is, meaning how many double bonds are available to cross-link. High iodine value oils are called drying oils, and they polymerize fast and hard. Low iodine value oils barely polymerize at all.
| Oil | Approx. smoke point | Iodine value | Oven temp |
|---|---|---|---|
| Flaxseed, unrefined | 225°F (107°C) | 170–200 | 450–500°F |
| Soybean shortening (Crisco) | 360°F (182°C) | 120–140 | 400–425°F |
| Canola, refined | 400°F (204°C) | 110–126 | 450°F |
| Grapeseed | 420°F (216°C) | 125–140 | 450°F |
| Sunflower, refined | 440°F (227°C) | 120–140 | 475°F |
| Soybean / generic vegetable, refined | 450°F (232°C) | 120–140 | 475–500°F |
| Avocado, refined | 500–520°F (260–271°C) | 75–95 | above most home ovens |
Grapeseed and refined canola are the right default. Both smoke well inside what a domestic oven can exceed, both carry enough unsaturation to cure into a durable film, and both are cheap enough that you will not ration them. Grapeseed is what Field Company and Smithey use on their pans. Refined sunflower behaves the same way at a slightly higher oven setting. Plain vegetable shortening is what Lodge sprays on at the factory and it cures beautifully at 400 to 425°F, which is useful if your oven runs hot or smoky.
Refined avocado oil is the wrong choice for oven seasoning, and it gets recommended constantly on the strength of its smoke point alone. At 500 to 520°F it does not meaningfully break down in an oven that tops out at 500°F, so it never crosses the threshold where polymerization starts. It is an excellent searing oil for exactly that reason. It is a poor seasoning oil for exactly that reason.
Why Flaxseed Flakes
Flaxseed oil is roughly half alpha-linolenic acid, a fatty acid with three double bonds, which puts its iodine value at 170 to 200 and makes it the most aggressive drying oil in the kitchen. It is the same compound that makes linseed oil set on a wooden floor. A flaxseed seasoning builds fast, cures glassy black, and looks spectacular after three cycles, which is why a widely shared 2010 blog post turned it into gospel.
The problem is what happens over the following months. A heavily cross-linked flaxseed film is hard and brittle, and it has a different rate of thermal expansion than the cast iron underneath it. Every time you heat and cool the pan, the polymer and the metal move by different amounts and the film takes the stress. Brittle films do not stretch. They crack, and then they lift and flake off in thin black sheets, often taking a clean patch of bare iron with them. It builds so quickly that people also tend to lay it on thicker than they would with grapeseed, which makes the problem worse.
The flakes are inert and harmless if you eat one. They also mean the finish is finished, because a flaking layer cannot be patched. Use flaxseed if you want a fast dramatic result on a display piece. Use grapeseed on a pan you intend to cook in twice a week.
Stripping a Rusted or Badly Seasoned Pan
Not every pan needs stripping. A pan with dull, patchy, uneven seasoning just needs cooking. A pan with sticky varnish, flaking sheets, or orange rust across the cooking surface needs to go back to bare metal, because you cannot build a good layer on top of a failing one.
Lye bath (best for old seasoning and varnish). Sodium hydroxide dissolves polymerized oil and does nothing to iron. Spray the pan thoroughly with a lye-based oven cleaner, seal it in a heavy trash bag, and leave it 24 to 48 hours. Wear gloves and eye protection and do this outdoors. Rinse hard, scrub with steel wool, and the black comes off in sludge. The pan will flash rust within minutes of drying, which is normal, so plan to season it the same day.
Vinegar bath (best for rust, and only for rust). A 50/50 solution of white vinegar and water dissolves iron oxide. Thirty minutes to an hour is the maximum. Acid does not stop at the rust, and a pan left in vinegar overnight comes out visibly pitted and permanently rough. Check it every fifteen minutes, scrub with steel wool, rinse, and dry immediately.
Self-clean cycle (fast, and it carries risk). An oven’s self-clean runs around 800 to 900°F and reduces everything organic to grey ash. It works. It also thermal-shocks the casting, and on thin vintage pans or pans with existing hairline cracks it can warp or split them. Lodge does not recommend it and will not warranty a pan that has been through it. I use it on modern heavy pans and never on anything collectible.
Mechanical. Steel wool, a wire wheel on a drill, or 80-grit sandpaper will take a pan back to metal with enough effort. It is the only option if you would rather not handle lye, and it is genuinely hard work on a 12-inch skillet.
After any of these, wash with hot soapy water, scrub off every loose particle, rinse, and dry the pan completely on a burner over medium heat until it is too hot to touch. Bare iron rusts in minutes. Move straight to seasoning.
The Initial Seasoning Cycle
Set the oven to 450°F, or 25 to 50°F above whatever your oil’s smoke point is from the table above. Put a sheet pan or a sheet of foil on the bottom rack to catch drips.
- Warm the pan. Put it on a burner over low heat for two or three minutes until it is warm to the hand, not hot. Warm metal takes a thinner, more even oil film than cold metal does.
- Oil every surface. Half a teaspoon of grapeseed oil on a paper towel, spread over the cooking surface, the walls, the rim, the exterior, the underside, and the handle. Rust does not care which side of the pan it is on.
- Wipe it back to bare. New paper towel. Wipe until the pan looks dry and matte and you would swear there is no oil left on it. Then wipe once more. This step is the difference between a good pan and a sticky one.
- Bake upside down for one hour. Inverted on the middle rack so nothing can pool. One hour at temperature, timed from when the oven is actually up to heat rather than when it beeps.
- Cool in the oven. Turn the oven off and leave the pan inside until it is cool enough to handle, at minimum an hour. Cooling slowly keeps the film from stressing.
- Repeat. Two or three cycles on a new pre-seasoned pan, four to six on a stripped or vintage one.
Expect smoke. A 450°F oven and an oil that smokes at 420°F is smoke by definition, so open a window and run the hood. The pan comes out somewhere between bronze and dark brown after the first cycle and gets darker with each one. It will not be jet black after three cycles and does not need to be.
Then cook on it. Fry eggs in butter, sear steaks, render bacon, shallow-fry potatoes. Cooking with fat at high heat is seasoning, applied unevenly but constantly across the exact surface that matters, and it builds a better finish faster than oven cycles do. Keep the acid off it for the first few weeks. Everything else is fair game, including a metal spatula and a decent pair of kitchen tongs for turning things, both of which burnish a cured surface rather than damage it.
Maintenance Seasoning After Every Cook
This takes ninety seconds and it is what keeps a pan improving instead of degrading.
Clean the skillet while it is still warm. Hot water, a stiff brush or a chainmail scrubber, and dish soap if you want it. Stuck-on food comes off with a splash of water in the warm pan and a wooden scraper. Rinse.
Dry it on a burner over medium heat. Not with a towel, on a burner, until the last of the water has steamed off and the pan is hot and completely dry. This is the step that actually prevents rust, and it is the step people skip.
Add about a quarter teaspoon of oil to the hot dry pan, wipe it over the cooking surface with a paper towel, then wipe it back until the surface is matte instead of glossy. Leave it on the heat another minute or two until it just begins to smoke, then kill the burner and let it cool. That is a full maintenance cycle, and doing it after every cook is why restaurant pans look the way they do.
If you leave the pan glossy with oil and put it in a cupboard, that oil never cures, and in a warm kitchen it goes rancid and sticky over a few weeks. Matte, not shiny.
What Actually Damages Seasoning
Acid. Tomato, wine, vinegar, citrus, and anything long-simmered with them. Acid hydrolyzes the polymer film and lifts it off the iron. A quick pan sauce with a splash of wine deglazed and poured out in ninety seconds is fine on a mature pan. A 45-minute tomato braise will leave the surface grey and thin, and the food will pick up a metallic taste. Braise in enameled cast iron or stainless.
Prolonged water contact. Boiling and long simmering soften and lift the film, and a pan left to soak in the sink will come out dull with rust spots forming in the low points. Boil your pasta in a stainless pot and drain it in a colander. Cast iron is for dry heat and fat.
The dishwasher. This one genuinely destroys seasoning, and it is worth understanding why, because the mechanism is completely different from hand washing. Dishwasher detergent is strongly alkaline, built on sodium carbonate and sodium metasilicate with enzymes on top, and it runs for an hour or more at high temperature in constant water. Alkalinity plus heat plus time is the same combination as a lye bath, just weaker and slower. Then the pan sits wet through the drying cycle and rusts. There is no version of this that ends well.
Building too thick, or too fast. Covered above. Thick layers flake.
Long dry heat with an empty pan. Preheating for two or three minutes is fine. Twenty minutes empty on high will carbonize the top of the seasoning into a black flaky crust sitting on a softer layer underneath.
Soap Does Not Ruin Cast Iron
I want to state this plainly because it is the piece of advice that causes the most actual damage. Dish soap does not harm seasoning. Seasoning is a cured cross-linked polymer bonded to iron. Dish soap is a surfactant that lifts loose fats and food residue and has no chemistry that touches a polymer. There is no sodium hydroxide in modern dish soap, and there has not been for generations. The rule dates back to when soap was made at home with excess lye and genuinely was caustic.
The damage attributed to soap is almost always the damage caused by what happened next: the pan sat wet, or it sat in the sink under a plate for two hours, or nobody dried it on the burner. Use soap. Dry it properly. That is the whole method, and it is the same method I would use on a carbon steel wok, which carries the same kind of polymer film on a thinner, more reactive body.
Reading a Finish and Fixing It
Sticky or tacky to the touch. Too much oil, or the oven ran below the oil’s smoke point, so the film never cured. Scrub it back with coarse kosher salt and a little oil on a paper towel, or steel wool if the tack is heavy. Wipe clean, then re-season with genuinely thin coats at a genuinely hot oven.
Blotchy grey and black. On a young pan this is normal and evens out with a few weeks of cooking. If it appeared suddenly after a tomato dish or a boil, acid or water stripped patches of film. Cook something fatty at high heat, or run one or two maintenance cycles, and it fills back in.
Flaking in thin black sheets. The layer was built too thick, or it is flaxseed, or a carbonized crust formed over a soft under-layer. A flaking film cannot be patched. Take everything loose off with steel wool, get down to a stable surface or to bare metal, and rebuild from there.
Orange rust. Water left standing. Scour with steel wool, or soak 30 minutes in 50/50 vinegar and water if the rust is heavy, rinse, dry on the burner immediately, and run two or three seasoning cycles. Rust is cosmetic on cast iron. The pan is not ruined.
Dark, even, slightly glossy, and slick. That is a finished pan. Leave it alone and keep cooking.
The Same Chemistry, Other Pans
Everything here applies to carbon steel and to cast iron woks, with one adjustment: a wok gets seasoned on the burner rather than in the oven, because a 14-inch bowl does not fit in a home oven and the heat needs to reach the sides. The oil chemistry, the thin-coat rule, and the smoke-point logic are identical, which is why the same grapeseed bottle handles both. If you are working out which pan to build a wok seasoning on, our guide to the best woks covers how carbon steel and cast iron differ in weight, heat response, and how quickly they take a first layer.
A cast iron skillet is one of the few pieces of kitchen equipment that gets better with use rather than worse, and it is nearly impossible to permanently destroy. Strip it, rebuild it, and cook on it. The pan will outlive you.
Frequently Asked Questions
Does dish soap ruin cast iron seasoning?
What is the best oil for seasoning cast iron?
Why is my cast iron skillet sticky after seasoning?
How many times do I need to season a new cast iron skillet?
Can you use metal utensils on a seasoned cast iron pan?
Related Articles
About the Reviewer

Nora Whitfield, CIA Culinary Arts, ServSafe Certified
A.O.S. Culinary Arts, The Culinary Institute of America
Nora Whitfield trained at the Culinary Institute of America and spent twelve years in professional kitchens, the last four running the test kitchen for a regional restaurant group where her job was to decide which equipment could survive a dinner service and which could not. She has seasoned more carbon-steel woks than she can count, boiled water in every kettle worth owning, and broken enough cheap gear to know exactly where manufacturers cut corners. She reviews kitchen equipment the way she specified it professionally: cook on it, clean it, and see what it looks like after a month.