How to Clean a Tea Kettle
Descaling is only the inside. A chef covers the rest: exterior stainless, heat tint, burner scorch, glass cloudiness, the electric base, the filter screen and the whistle.
Updated
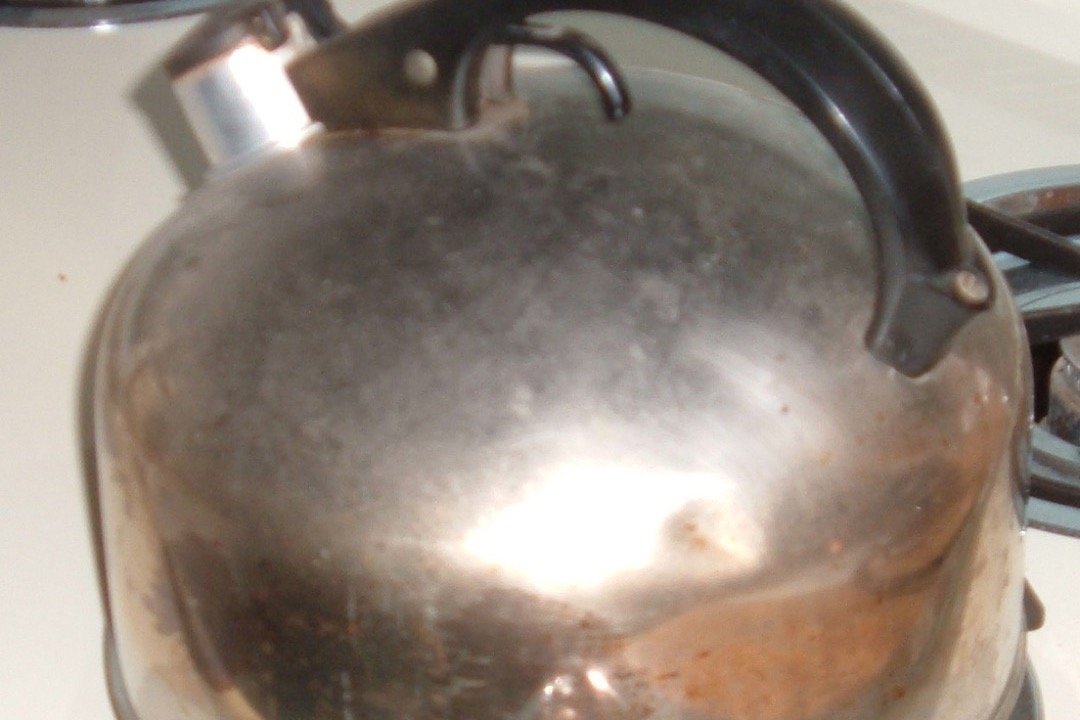
Almost everything written about cleaning a kettle is about limescale, and limescale is only the inside. It is the half of the job with the satisfying chemistry, so it gets all the attention, and meanwhile the kettle that actually annoys you is the one with a brown scorch ring around its base, a rainbow stain up one side, a cloudy glass body you cannot get a hand into, and a filter screen nobody has looked at in two years.
I ran a restaurant group’s test kitchen for four years, and kettles are the appliance that taught me how differently people treat the inside and the outside of a thing. The interiors got descaled on a rota because someone had written it on a wall chart. The exteriors got wiped when a guest was coming. By the end of a year the kettles worked perfectly and looked like they had been recovered from a fire.
This guide is deliberately the other half. If your problem is a chalky white crust on the element or flakes in your cup, that is limescale, it is calcium carbonate, and it needs an acid rather than a scrub. Our guide to descaling a kettle covers that properly, including why baking soda cannot do the job and which vinegars are worth using. Everything below assumes the inside is handled and deals with the exterior stainless, the heat tint, the burner scorch, the glass body, the electric base and contacts, the filter, the whistle, the staining that is not scale, and the rust spots that are not really rust.
The Ten Seconds That Prevent Most of This
Everything difficult on this page began as something easy. Grease film that has been baked on twenty times is a job. The same film, wiped off the evening it landed, is not. Water spots that have dried and redried for six months leave mineral marks that need a cleanser. The same droplets, dried with a cloth, leave nothing at all.
So the routine is short and it front-loads all the value. After the kettle has cooled, wipe the outside with a damp cloth and then dry it with a dry one. That is the whole daily practice, and KitchenAid’s own care guidance says exactly this: use a damp cloth to remove splashes and residue, then dry and polish with a soft cloth. The drying step is the one that matters. Stainless left to air dry keeps the minerals that were in the water sitting on its surface, which is where spotting comes from, so a rinse without a dry is not really a clean.
Once a week, wash the exterior properly with warm water and dish detergent, including the handle where hand grease collects and the spout where drips run back. Keep soap out of the interior. Once a month, look at the parts you never look at: the mesh filter in the spout, the whistle cap on a stovetop kettle, and on an electric kettle the contact ring on the base.
Cleaning the Outside of a Stainless Steel Kettle
For everyday film, dish soap on a soft cloth is the correct tool and there is no need to be cleverer. Wash the outside, wipe it with a damp cloth to take the detergent off, and dry it. If you want the finish to look actively good rather than merely clean, a small amount of olive oil on a microfiber cloth, rubbed over the exterior, brings back a shine that soap alone leaves flat. That is not a folk remedy, it is in KitchenAid’s published guidance, and it works because it fills and evens the microscopic texture of the brushed surface.
When something has baked on and soap will not shift it, the instinct is to scrub harder and that is the wrong move. Move up in chemistry, not in abrasion. A powdered or creamed cleanser designed for stainless will lift baked residue that detergent cannot, and Bar Keepers Friend states that its Cleanser, Soft Cleanser and Spray and Foam are all suitable for regular cleaning of stainless steel kettles, stovetop or electric, and are non-abrasive when used correctly. Wet the surface, apply, give it a minute, work it gently with a soft sponge, rinse thoroughly and dry. The rinse and the dry are not optional, since cleanser residue left on stainless dulls it.
A note on which way you rub. Brushed stainless has a grain, visible if you look along it in good light. Work with the grain rather than across it and any marks you do leave will disappear into the existing texture instead of crossing it.
If the kettle is old enough that the finish is already scratched and dull, accept that the scratches are permanent and clean for hygiene rather than for looks. Most of the dramatic before-and-after photographs in this category are of kettles that were dirty, not kettles that were damaged. A good stainless steel kettle that has been wiped dry since it was new mostly does not need rescuing.
Heat Tint, the Rainbow Stain Everyone Thinks Is Damage
At some point a stainless kettle that lives on a hob develops a patch of colour, usually low on the body where the flame reaches, running through straw and gold into brown, purple and blue. People assume it is scorching or a coating breaking down, and it is neither.
Stainless steel resists corrosion because chromium in the alloy reacts with air to form an extremely thin, transparent layer of chromium oxide across the surface. Heat makes that layer grow. Once it is thick enough it starts interfering with light passing through it, and interference produces colour, in a predictable sequence that runs with temperature. That is heat tint. The metal underneath is unchanged, the protective layer is if anything thicker than before, and the kettle is entirely safe.
If you want it off for cosmetic reasons, it responds to acid rather than to scrubbing. Bar Keepers Friend is the standard answer and is specifically noted for removing heat tint from stainless steel, and the method is the same as for any baked residue: wet, apply, wait, work gently, rinse well, dry.
The more useful fix is preventing it. Heat tint that keeps coming back in the same place almost always means the burner is set wider than the base of the kettle, so the flame is climbing the sides instead of heating the bottom. That wastes gas, tints the steel and does not boil the water any faster. Size the flame to the base. This is worth attention on gas in particular, and a kettle chosen for a gas burner usually has a wide base precisely so the flame stays underneath it.
Burner Scorch and Baked-On Grease
The brown-to-black ring around the underside and lower sides of a stovetop kettle is different from heat tint. This is carbonised material: cooking splatter, boil-over from the pan next door, dust and airborne grease, all of it baked repeatedly until it has polymerised into a hard film. It does not wipe off because it is no longer really a deposit, it is a coating.
Chemistry again, not force. A cleanser with genuine grease-cutting detergent is what breaks it down, and Bar Keepers Friend’s Cookware Cleanser and Polish is formulated with substantially more grease-cutting detergent than the standard powder for exactly this problem. Apply it to a wet surface, and this is the one case where patience genuinely substitutes for pressure: leave it several minutes, work gently, rinse, and repeat rather than pressing harder. Two gentle rounds beat one aggressive one, and they leave no scratches.
Prevention is mostly about where the kettle lives. A kettle parked permanently on the back burner is standing in the splatter zone of everything else you cook. It will acquire a film whether or not you ever boil it. Moving it off the hob between uses is a bigger win than any cleaner.
Electric Kettles: the Base, the Contacts and the Filter
Electric kettles have three parts that need cleaning and one absolute rule.
The rule: the base never goes in water. The power base of a cordless kettle carries the mains connection and the electrical contacts that meet the kettle body. Immersing it is a shock hazard and will ruin the appliance. Unplug it, let everything cool, and clean it with a barely damp cloth, then dry it at once. If there is a dried spill or a crust of mineral on the central contact ring, dampen the cloth with a little diluted white vinegar rather than pouring liquid onto the base itself, then go over it with a clean damp cloth and dry thoroughly.
The contact plate on the kettle body is the other half of that connection and it collects the same deposits. Check it whenever you clean the base. If your kettle has started switching off before it boils, failing to start, or sitting oddly on its base, deposits between these two surfaces are a common and completely fixable cause, and almost nobody thinks to look.
The filter screen sits in the spout on most electric kettles and it is the single most neglected part of the appliance. It exists to stop scale flakes reaching your cup, which means by design it fills with scale flakes. On most models it pops or slides out. Rinse it under a running tap, brush it with a soft brush if it is furred, and if it is heavily crusted let it soak in a diluted vinegar or citric acid solution separately from the kettle, then rinse and refit. A blocked filter makes a kettle pour badly and slowly, which people usually blame on the spout design.
Exterior cleaning of an electric kettle is the same as any stainless: soap, damp cloth, dry cloth. One caution worth naming. Many cheaper electric kettles are plastic, or a mix of metal and plastic, and Bar Keepers Friend does not recommend its products on plastic, advising a spot test if you intend to try. That is worth knowing if you own a stainless electric kettle with no plastic in the water path, because those still often have plastic in the housing, the lid mechanism or the handle even when the interior is entirely steel.
Glass Kettles: Cloudiness and a Body You Cannot Reach Into
Glass hides nothing, which is the appeal and the problem. Cloudiness in a glass kettle has two separate causes and they need opposite treatments, which is why people scrub for an hour and get nowhere.
Mineral haze is hard water deposit, thin and even, and it is an acid job. That is descaling, and it belongs in the other guide.
Tea and tannin staining is organic film, usually browner and often ringed at the fill line, and acid barely touches it. It needs mild mechanical action with a detergent or a mild alkali: dish soap and a soft bottle brush, or a paste of baking soda worked gently over the stained area. Bar Keepers Friend recommends its Cookware Cleanser and Polish for glass and ceramic kettles specifically, applied to a wet surface, left a minute and rubbed with a soft sponge.
The real obstacle with a glass body is reach, because the opening is usually too narrow for a hand. A long-handled soft bottle brush is the tool that solves this and it costs very little. What you must not do is use anything abrasive. Scratches in glass scatter light, and a scratched glass kettle is permanently cloudy in a way no cleaner will ever fix. That is the one irreversible mistake in this entire guide, and it is why glass kettles reward a gentle routine more than any other material.
The Whistle and Spout Assembly
A whistling kettle goes quiet or reedy long before it stops working, and the cause is almost always the whistle rather than the kettle. The whistle is a small chamber with precisely sized openings, sitting directly in the path of steam carrying whatever the water has in it, so it collects mineral deposit faster than any other part of the kettle. As the openings narrow, the pitch drops and the volume falls.
On most kettles the cap lifts, unclips or unscrews. Take it off, look through it against the light, and if the holes are furred, soak the cap separately in a diluted vinegar or citric acid solution, then rinse it thoroughly and refit. The same soak clears a scaled faucet aerator, one of the more useful household uses of vinegar. Do not attempt to clear the openings with a pin or a needle, because deforming them changes the pitch permanently.
The spout deserves the same monthly look. Drips run back down the outside and dry there, and the inside of a spout is another place a hand cannot reach. A bottle brush does it.
Rust Spots, and Why Stainless Steel Does Not Usually Rust
Orange or brown speckling on a stainless kettle, typically near the seams, around the spout weld or at the base, is genuinely alarming the first time and is usually not what it looks like.
Most of the time this is not the kettle’s own steel corroding. It is surface contamination: microscopic particles of ordinary carbon steel deposited on the stainless surface, from a steel wool pad, from a scouring sponge that was used on a cast iron pan first, or from sitting in a sink next to something rusting. Those particles rust, and because they are sitting on the stainless they look exactly like the stainless is rusting. The fix is an acidic cleanser, which removes the contamination and lets the chromium oxide layer reform underneath.
Genuine pitting corrosion in the steel itself does happen, and the usual causes are chlorides and prolonged acid exposure. Bleach is the one to avoid absolutely, since chloride attack on stainless is well established. Salty water left standing does it slowly. Descaling solution left sitting for days rather than the recommended time will do it too, which is one of the better arguments for descaling on schedule and rinsing properly instead of leaving a kettle full of vinegar over a long weekend.
What Actually Damages a Kettle
Five things, and every one of them appears in kettle-cleaning advice somewhere online.
Steel wool and scouring pads. They leave a scratch pattern that holds grease, dulls the finish and cannot be undone. On glass they are catastrophic.
Bleach and chlorine cleaners. Chlorides attack stainless steel. There is no version of this that is a good idea on a vessel you boil drinking water in.
Abrasive powders inside the kettle. Zojirushi states plainly that baking soda is not recommended for its water boilers because it is abrasive, will scratch the liner and can clog the dispensing mechanism, and Fellow warns that abrading the inner surface leads to worse limescale afterwards and can start rust. Scratched metal gives scale more to grip.
The dishwasher, for anything not explicitly rated for it. Aluminium kettles in particular discolour and dull, which Bar Keepers Friend calls out directly, and no electric kettle body with contacts on it should ever go near one.
Letting it boil dry. This is the one that does structural damage rather than cosmetic. A dry kettle on heat can warp its base, which then sits badly on a hob or on an electric contact plate forever after, and on an electric kettle it stresses the element even where a cut-out saves it. A warped base is the most common reason a perfectly clean kettle rocks, heats unevenly or fails to seat.
A Realistic Schedule
Daily, wipe and dry the outside after it has cooled. Weekly, wash the exterior, the handle and the spout with warm soapy water and rinse the interior with clean water. Monthly, pull and rinse the filter screen, check the whistle cap, and on an electric kettle wipe the base contacts and the kettle’s contact plate. Descaling sits outside this rhythm entirely and runs on your water hardness, which is covered in the descaling guide.
Two habits do more than any product. Empty the kettle rather than leaving water standing overnight, because standing water evaporates and concentrates its minerals against the metal. And dry it after you wipe it. Nearly every mark discussed on this page is a drop of water that was allowed to dry where it landed, and if you own a temperature control kettle or a whistling kettle that you rely on, those two habits will keep it looking and working right for years longer than any amount of rescue cleaning will.
Frequently Asked Questions
How do you clean the outside of a stainless steel tea kettle?
How do you clean an electric kettle base?
Why is my stainless steel kettle turning blue or rainbow coloured?
How do you clean a glass tea kettle so it stays clear?
How often should you clean a kettle?
Related Articles
How to Descale a Kettle
kettles-boiling
14 Best Stainless Steel Tea Kettles of 2026, Tested by a CIA-Trained Chef
kettles-boiling
10 Best Glass Tea Kettles of 2026, Tested by a CIA-Trained Chef
kettles-boiling
12 Best Tea Kettles of 2026, Stovetop and Electric, Chosen by a CIA-Trained Chef
kettles-boiling
9 Best Stainless Steel Electric Kettles of 2026, Tested by a CIA-Trained Chef
kettles-boiling
About the Reviewer

Nora Whitfield, CIA Culinary Arts, ServSafe Certified
A.O.S. Culinary Arts, The Culinary Institute of America
Nora Whitfield trained at the Culinary Institute of America and spent twelve years in professional kitchens, the last four running the test kitchen for a regional restaurant group where her job was to decide which equipment could survive a dinner service and which could not. She has seasoned more carbon-steel woks than she can count, boiled water in every kettle worth owning, and broken enough cheap gear to know exactly where manufacturers cut corners. She reviews kitchen equipment the way she specified it professionally: cook on it, clean it, and see what it looks like after a month.